What is a DAM?
A Digital Asset Management (DAM) product is a business solution for organizing, storing and retrieving rich media and managing digital rights and permissions. Media assets include photos, music, videos, animations, podcasts and other multimedia content. Digital Asset Management solutions provide a useful way to maintain a centralized repository for your project’s files, allowing shared access to all up-to-date records and data.
Setting up your Cumulus Integration
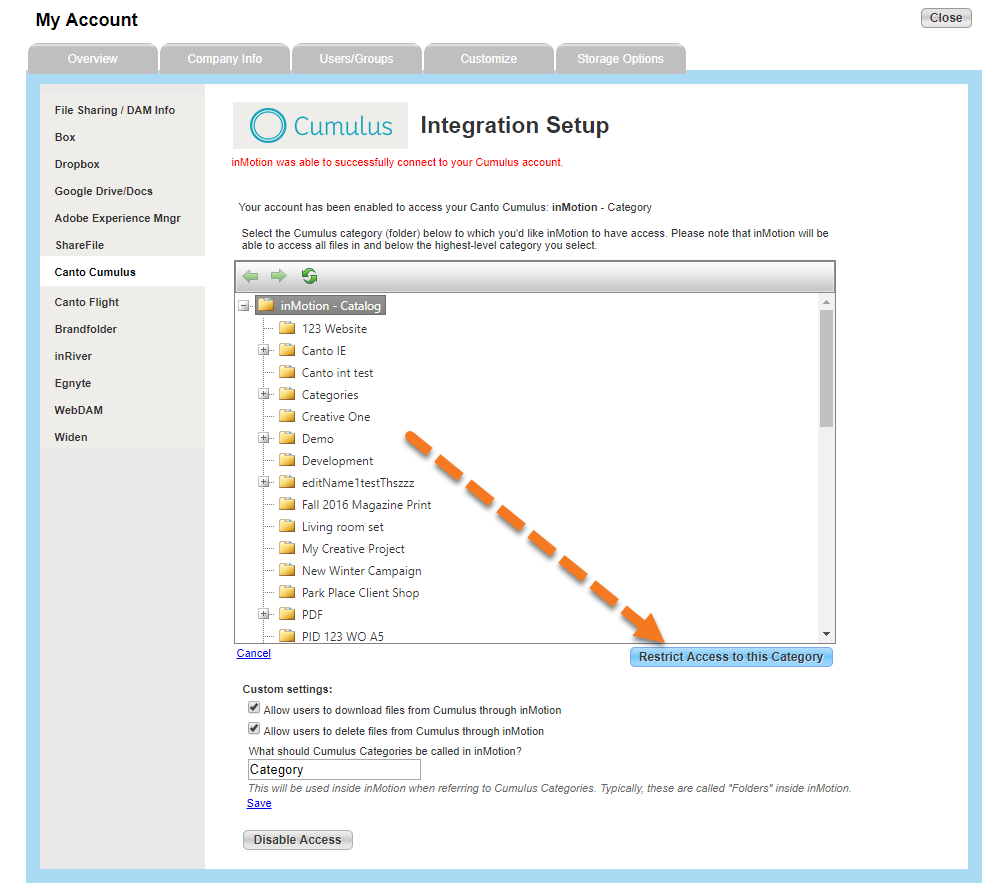
To integrate your team's DAM with inMotion, go to Account > Account Settings > Storage Options > Canto Cumulus.

Once you select Canto Cumulus, you will be prompted with a series of instructions to assist you in enabling your account. Enter your ‘Server Address,’ ‘Catalog Name,’ ‘Username,’ and ‘Password,’ then click Allow Access.

We strongly recommend that admins set up their account’s DAM integration(s) with a service account instead of a personal account. This will allow only the files that you want your users to access to be the only ones made available.
Now that you have granted inMotion access to your Cumulus account, you will need to determine a root folder, where you would like all subsequent project folders from inMotion to be stored. Simply click on which folder you would like to use, then click Restrict Access to this Category.
From this page, you can also enable or disable permissions that allow users the ability to delete and download files.
Your DAM is now setup. You can close Account Settings and use your new integration.
Uploading Project Files
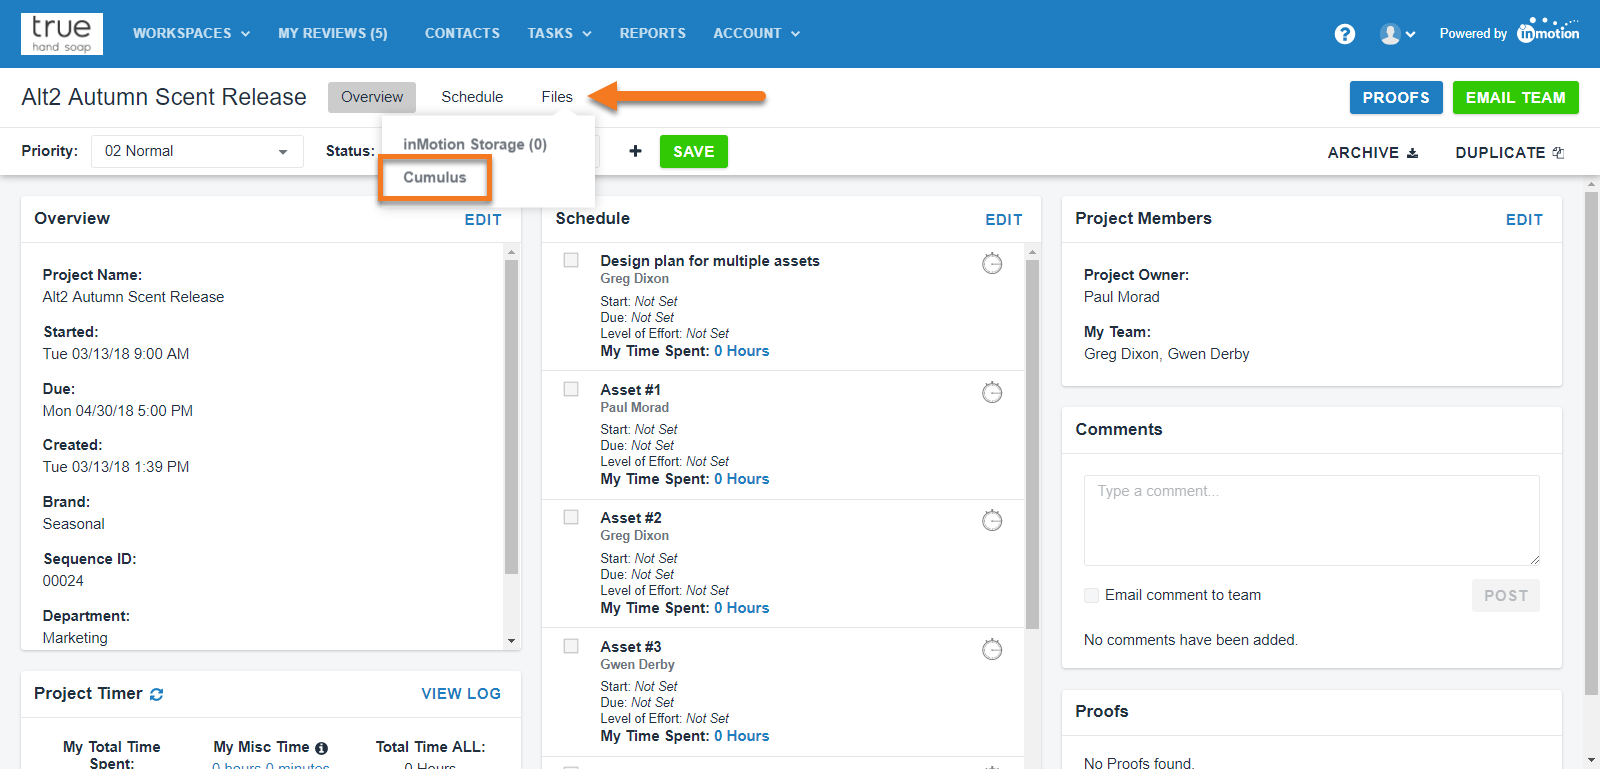
With your Cumulus integration, you can upload shared working project files from inMotion. To upload a file, navigate to the Project Dashboard and click Files > Cumulus near the top of the page. If you are in a new project, inMotion will prompt you to name a new project category in Cumulus. Once the Project Category is established, any file loaded into that project in inMotion will be shared with Cumulus and any file loaded into that category through Cumulus will be shared back to the inMotion Project.
If you have any project files created prior to the newly created project folder in inMotion, you will want sign into Cumulus and move them to the applicable folder.
Once in the DAM storage page, click the green UPLOAD button in the top right. Either drag and drop the relevant file or click CHOOSE FILE to select the file(s) you'd like to upload. To download or delete files in the project folder, right click on the file name and click ‘Download’ or ‘Delete.’
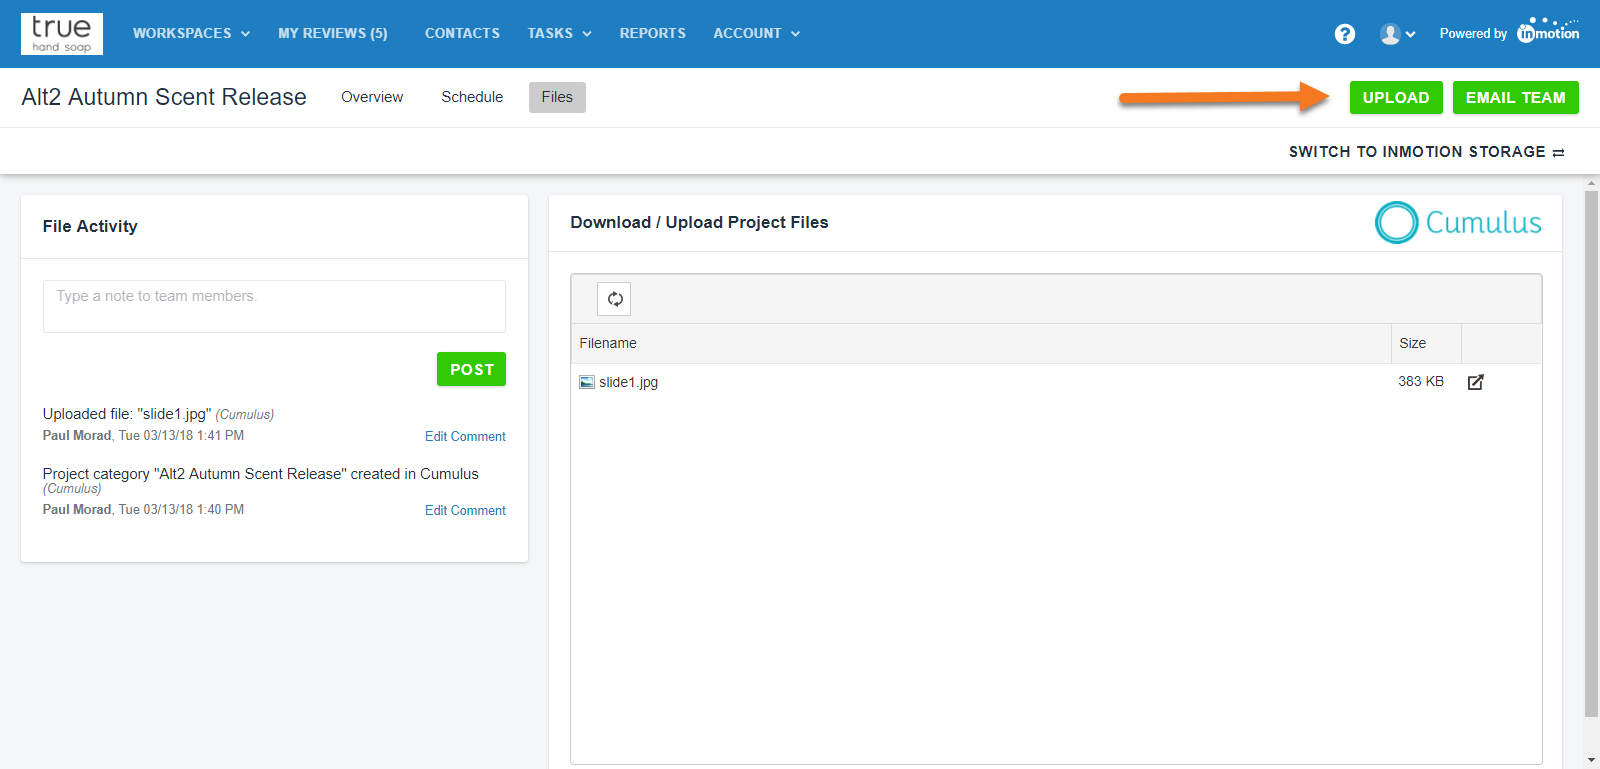
You can navigate back to the Project Dashboard using the Overview link near the top left-hand side of the page. Now, all team members can access the project files in one centralized location.
Uploading Proof Assets from Cumulus
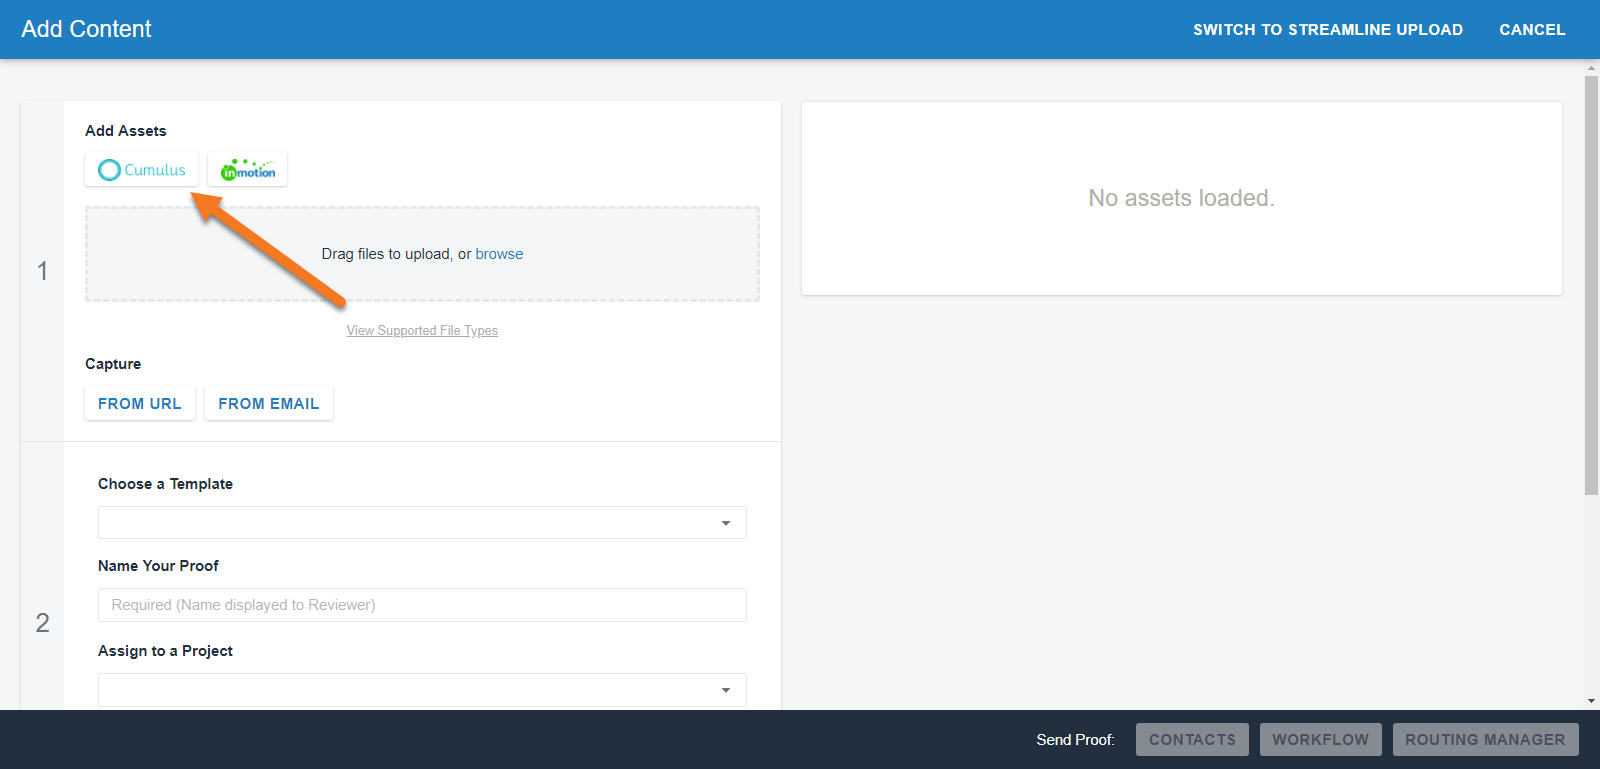
Users can also upload proof files directly from Cumulus by selecting the Cumulus icon in Step 1 of adding content for review. Select the file from Cumulus and click Upload.