
Adding Content
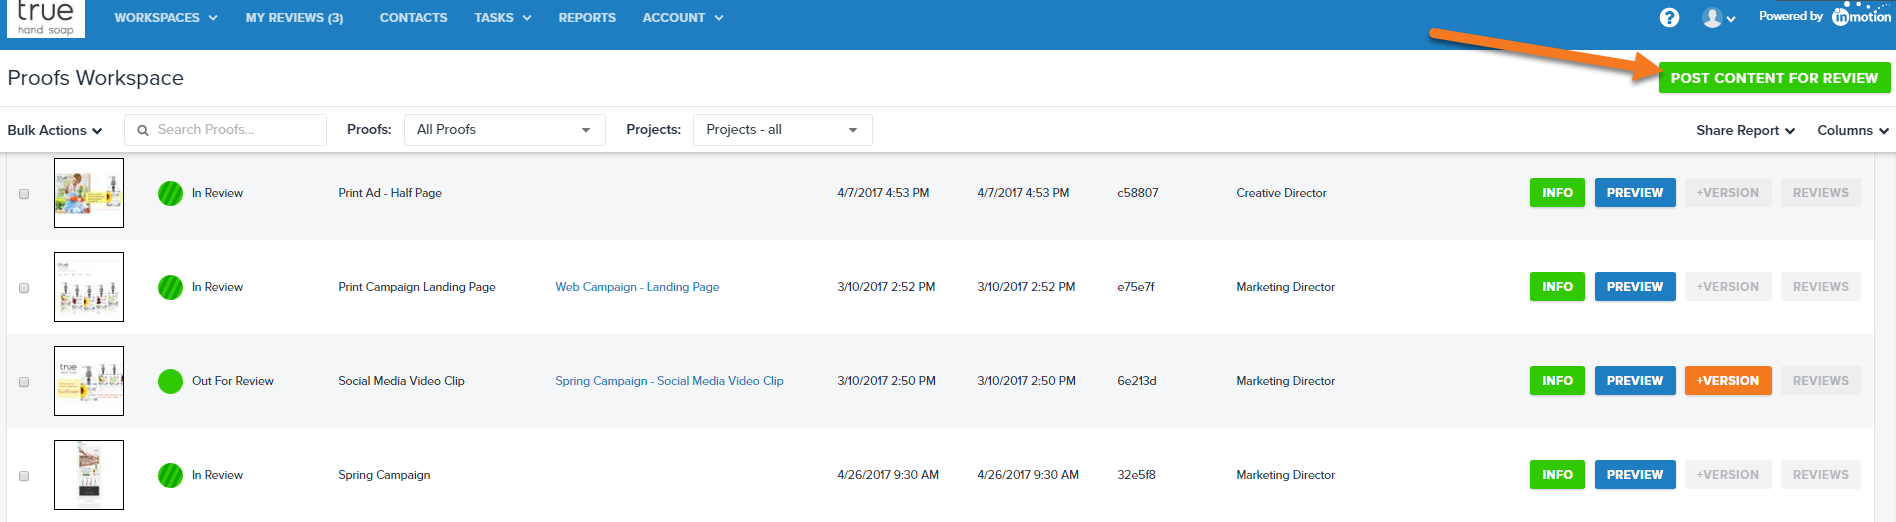
To post a new proof for review, navigate to your Proofs Workspace. Click, POST CONTENT FOR REVIEW.
- In Step 1, select your file(s) using one of the available selections. Your file will begin the upload progress in the right hand column. If you have a multiple page document, you will see each page load as a separate asset. You can name each asset/page accordingly. +Note will allow you to provide asset related notes to your reviewers.
- In Step 2, enter a name for your proof and assign your proof to a project when applicable.
- In Step 3, you can attach proof reference files like Adobe CC files, logo images, etc. These are not converted by the system.
- When you're ready to proceed, select the routing method you want to use in the bottom right of the page.

Release Options
Once you've chosen your reviewers, you will land on the Release Options page.
Review Interface Options
- Approval Statuses - Customize the available statuses shown to reviewers
- Place Proof 'On Hold' - Allow another user to route a proof
- Proof Options - Allow proof forwarding (which also enables @mentioning), proof download and/or proof printing
- Assign User Group - Manages proof visibility in the Proofs Workspace
- Proof Deadline - Set a deadline for reviewers
- Subscriber List - Setup email subscriptions for updates related to this proof
- Web Page URL Reference - Add a URL in reference to this proof
- Message to Reviewer - Add customizable instructions on how to complete the review
Email Options
- 'Do NOT Send an email notification' - Disable email invitation related to this review
- 'Include reviewer's list in the email' - Let your reviewers know who else is invited to the review
- Email Body - Add additional messaging to the email invitation to the proof

When you're finished setting the Release Options, click Continue and you'll be taken to the Release Summary. Here, you will see an overview of the content you uploaded, the reviewers you selected, and the release options that you set. If you need to go back and change anything, click the Edit button below the section you need to change and click Save. Click Finalize to release your proof.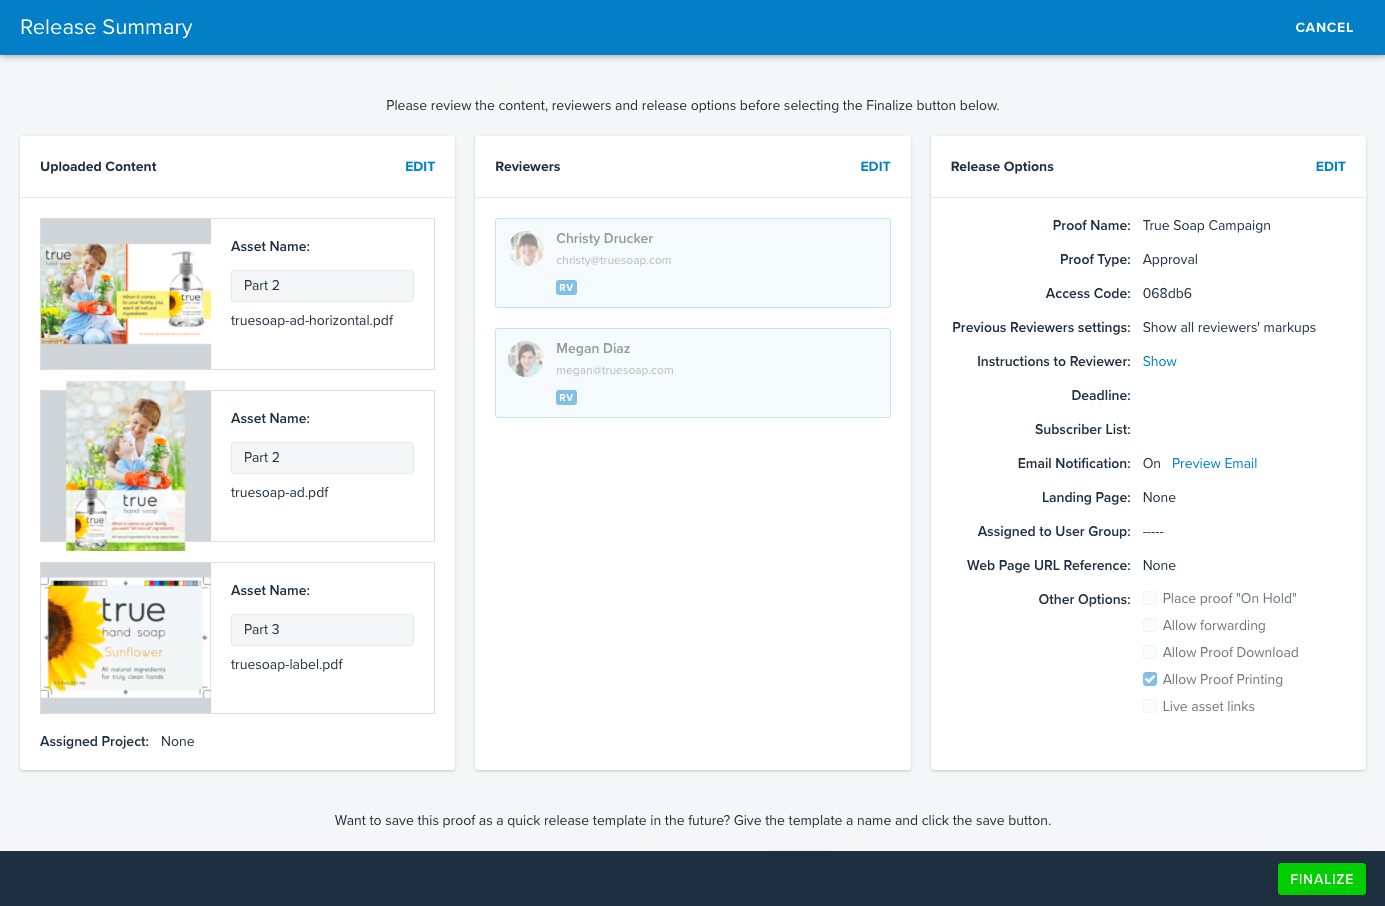
On the Release Summary page, you can also save these proof reviewers and release options as a Proof Template, if these are commonly used settings.