Creating a Report
To get started, you will choose the REPORTS option in the blue toolbar:

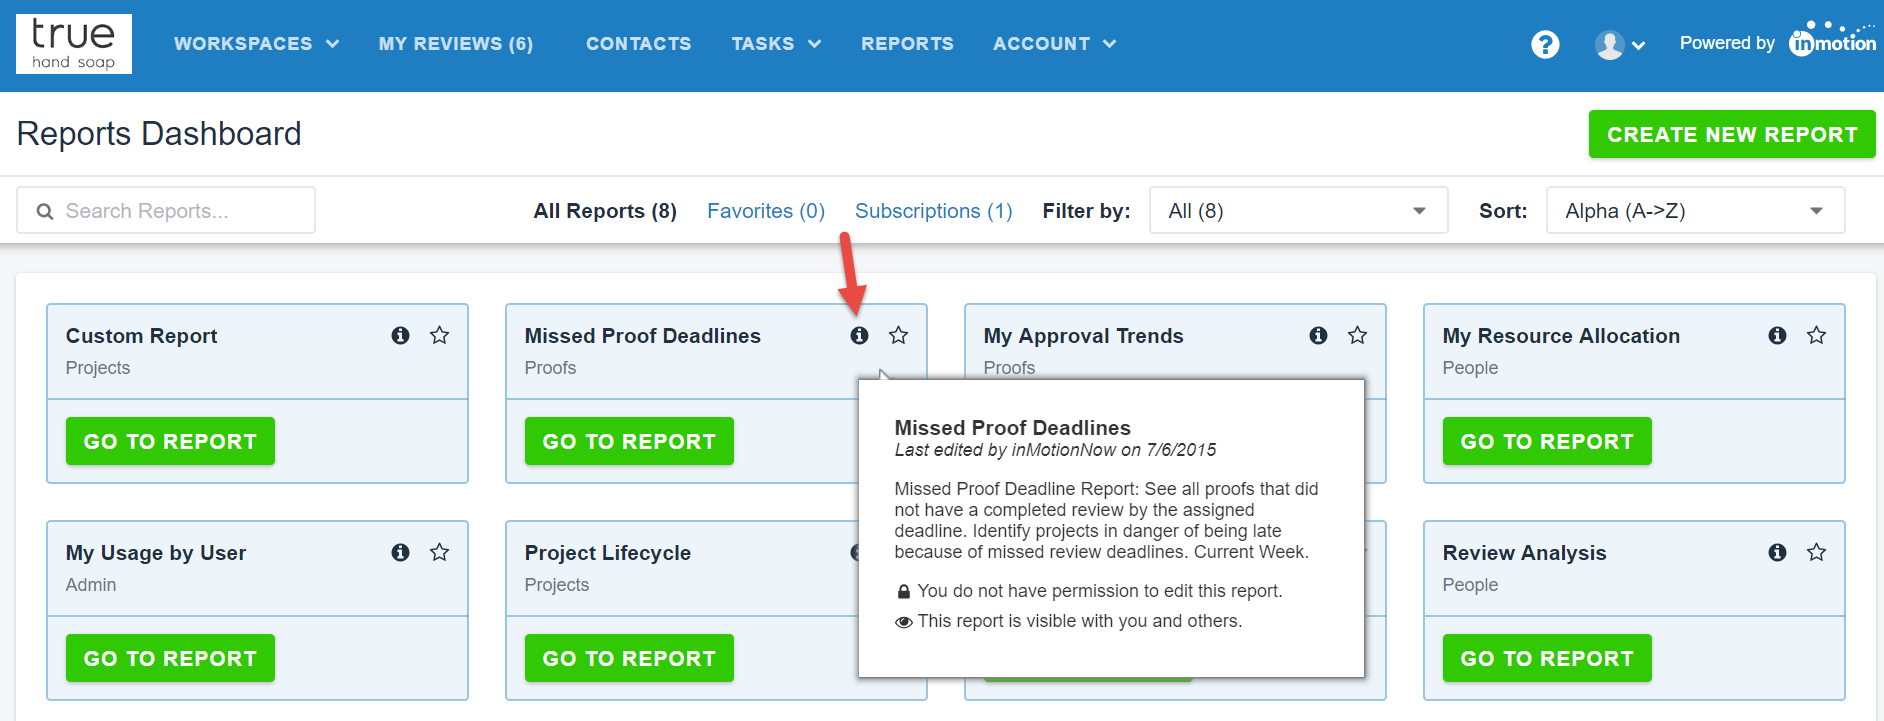
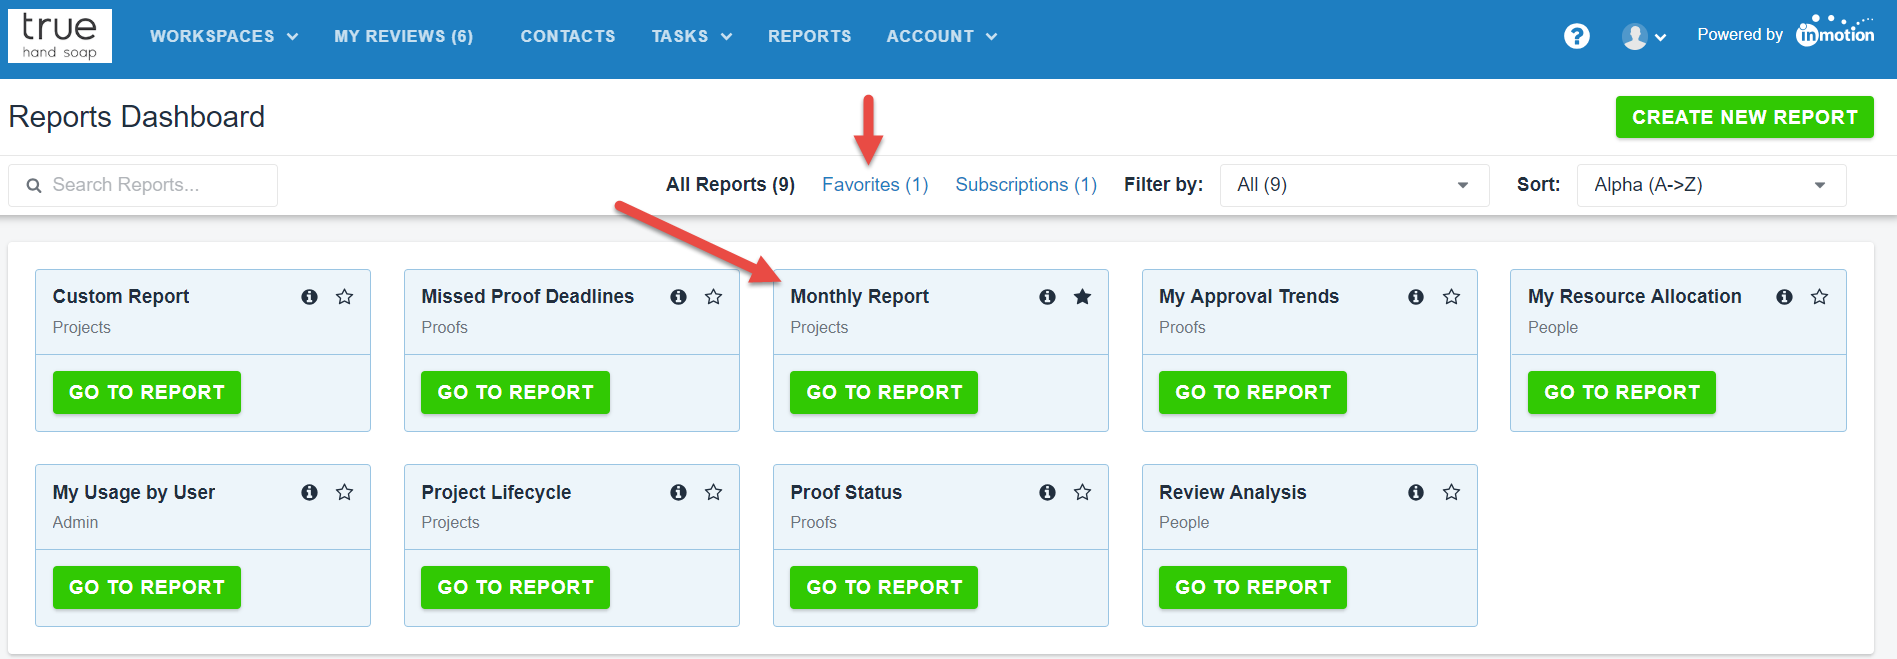
You will be presented with a few default reports that you can run immediately.
Click the “i” to the right of the report titles to see what results will display for each specific report.
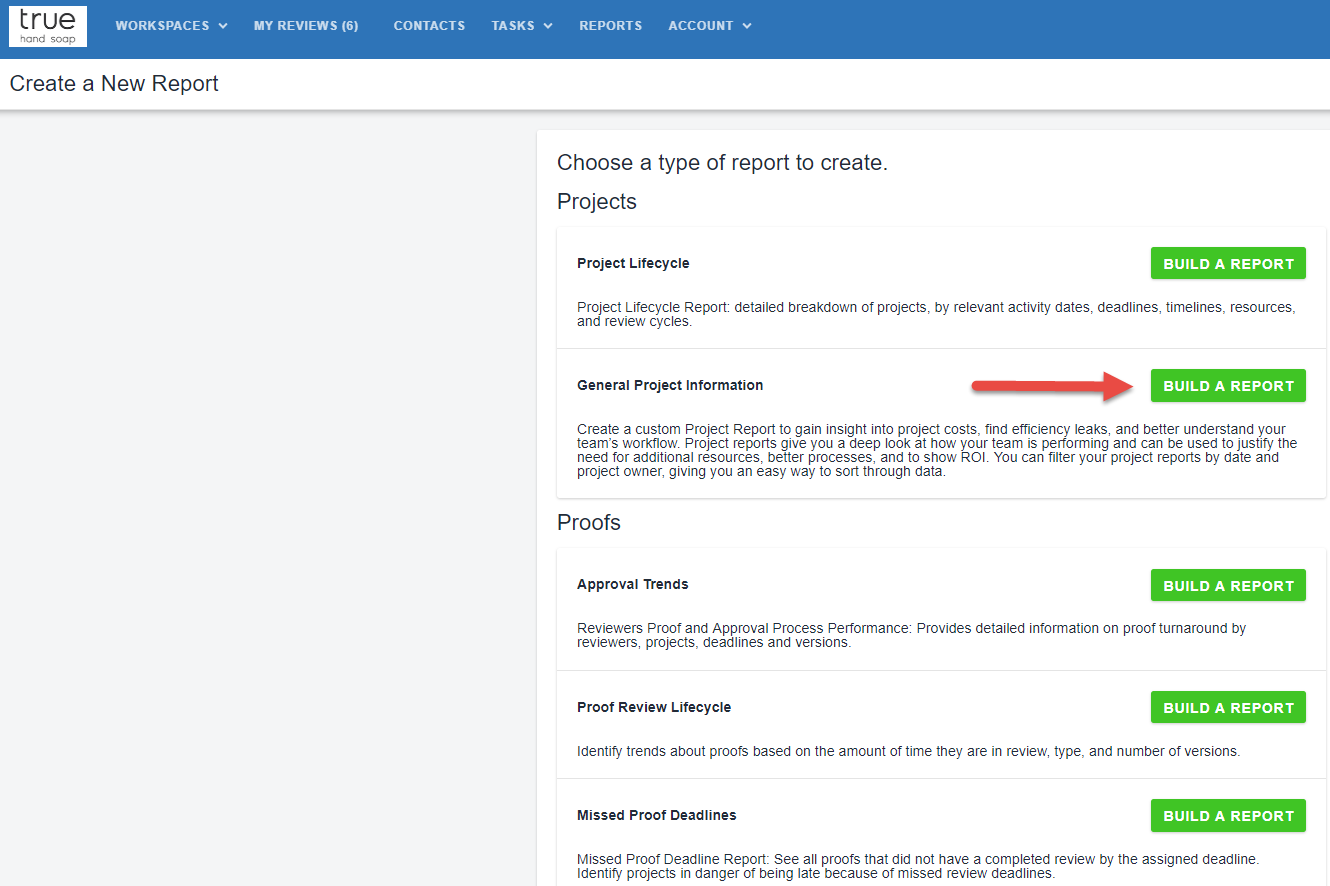
To create your own custom report, click the CREATE NEW REPORT button in the top right side of the screen. You will find a list of different categories including: Projects, Proofs, People, Admin, Tasks, Timesheets, and Job Launches. Choose an individual report on which to base your customizations. Click BUILD A REPORT to continue.
Once you have chosen the BUILD A REPORT button, you will be brought to a screen where you can choose the criteria that the report will be based on. Make you desired selections and click RUN REPORT.
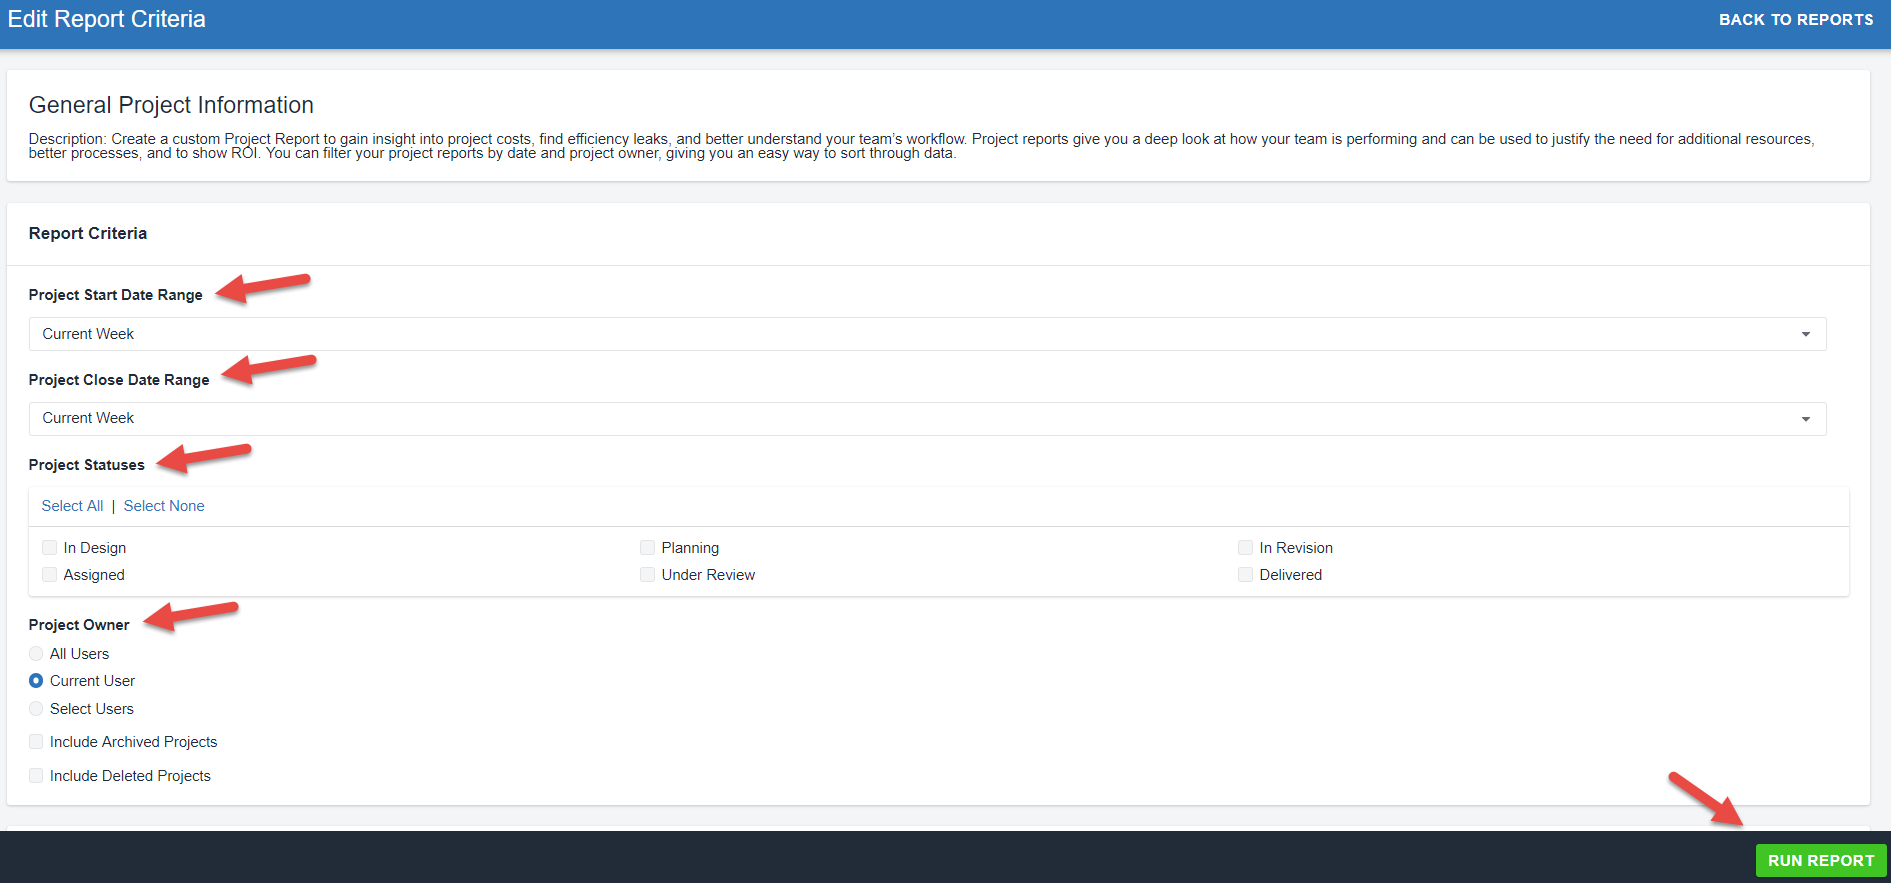
When you click RUN REPORT, you will be brought to your results.
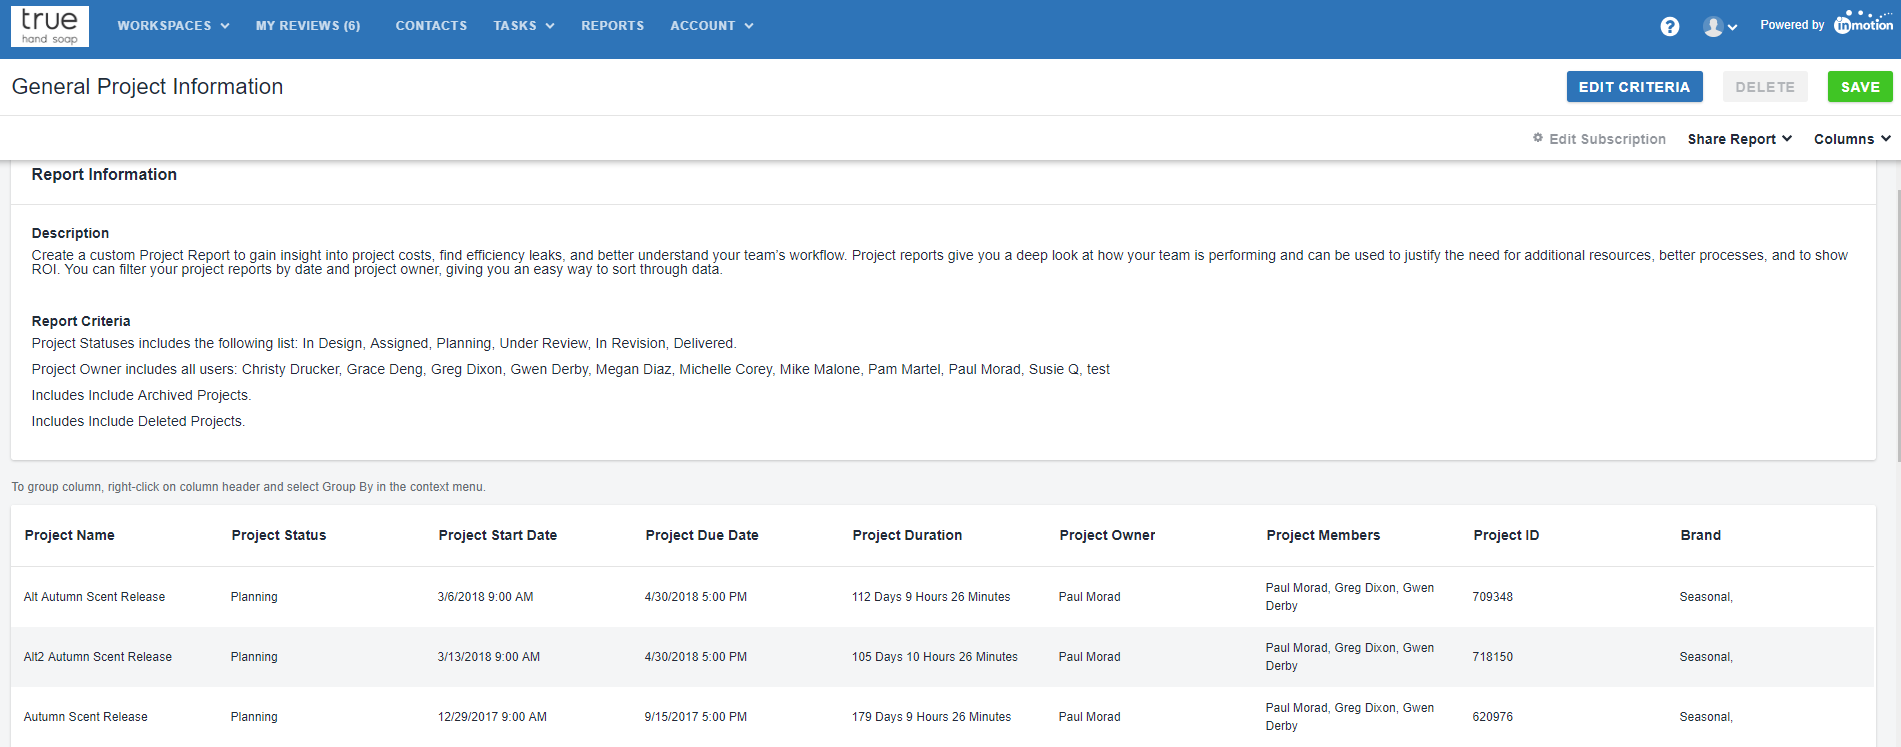
From here, you can re-arrange the columns by clicking and holding the column headers and dragging them where you want them. Also, you can customize the displayed content by hiding columns you do not want to see and revealing others.
Simply click the Columns menu on the top right side of the screen to choose which ones to show or hide and click APPLY.

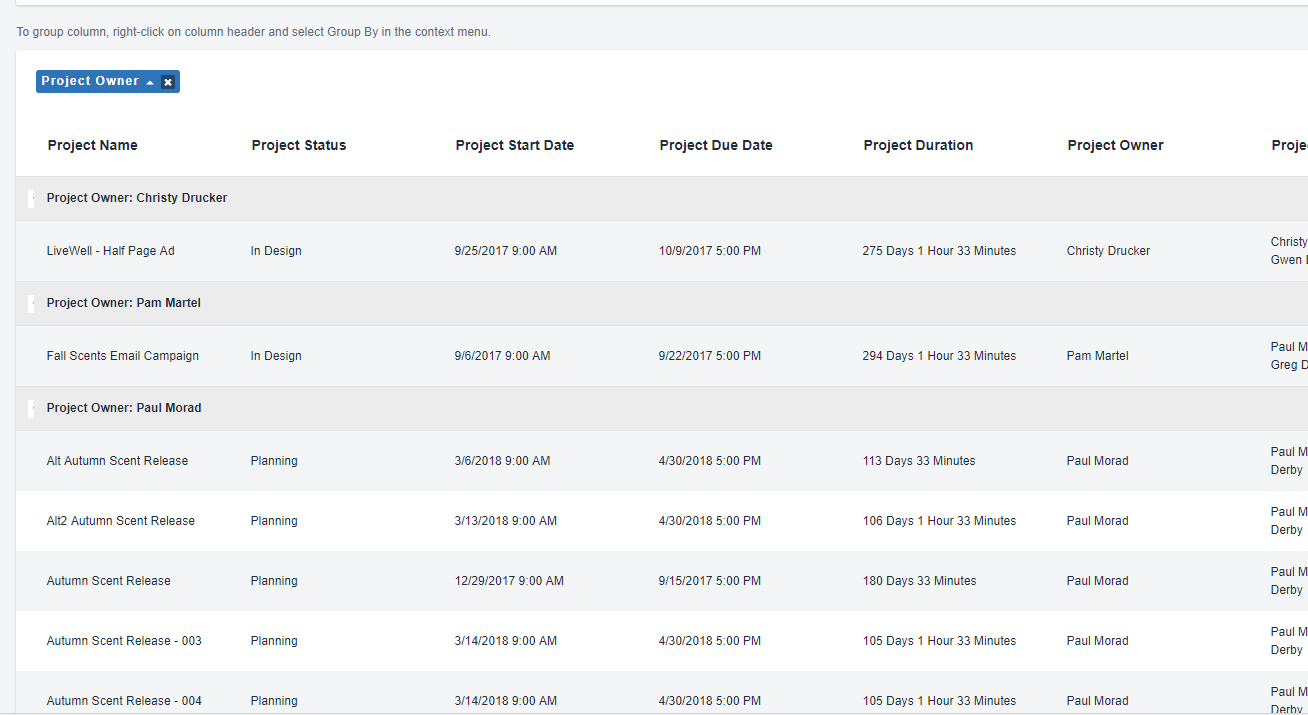
You can also group the report data by certain fields. For example, if you right click the Project Owners column and choose, Group By the report will show the list in an organized view by owners.

You can remove the grouping by clicking on the X in the blue project group selector. You can also collapse individual groups by selecting the arrow symbol to the left of the grouping header.
Saving Your Report
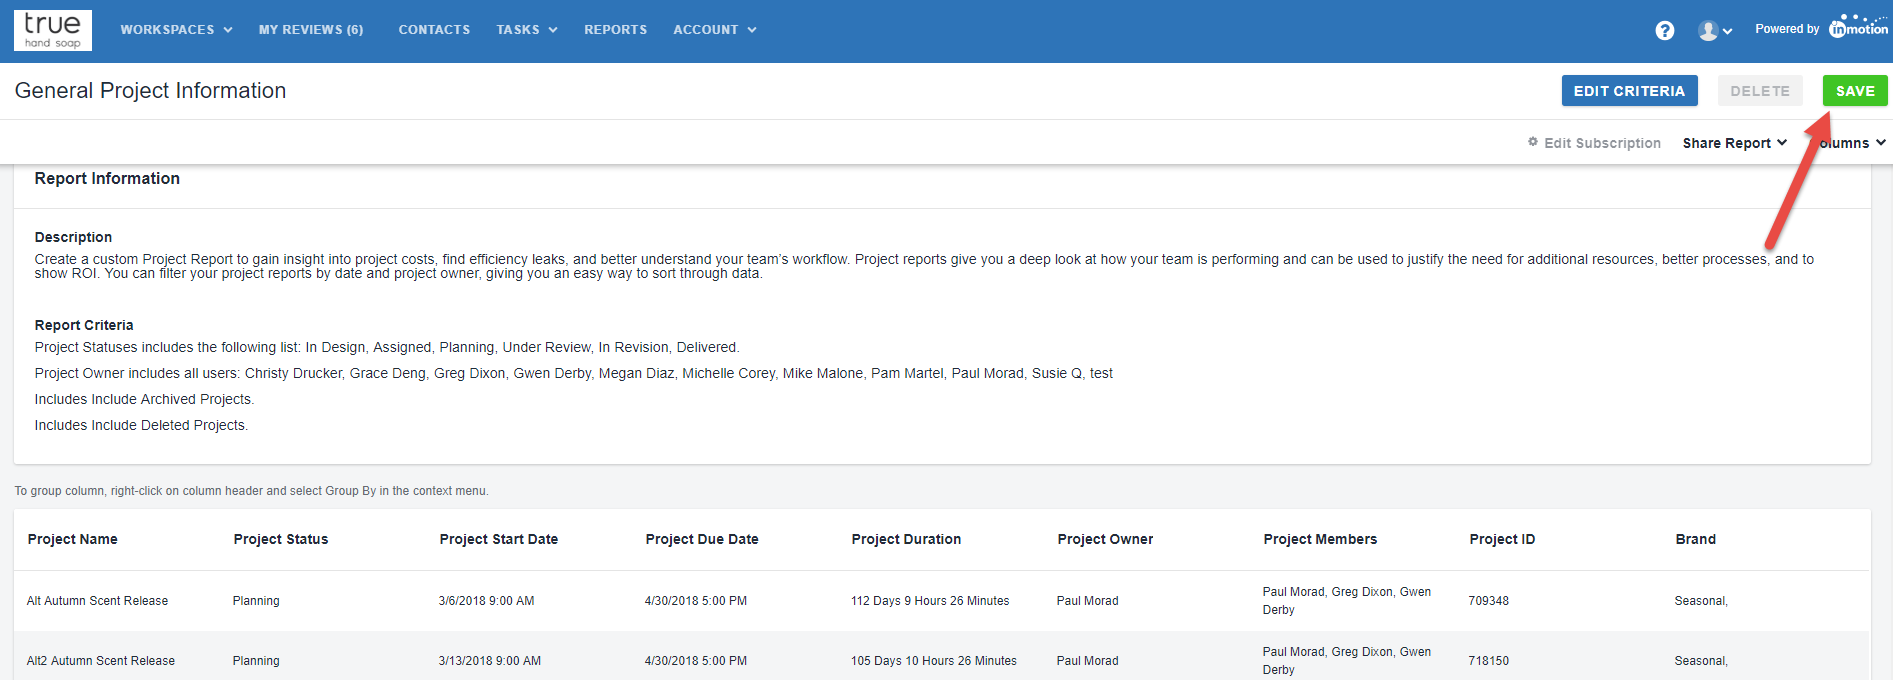
You can also save frequently used reports so that they are easily accesible from the reporting dashboard. Once you've customized your favorite report, click SAVE in the top right of the screen.
On the following page, you will be required to fill out the Name and Description fields to save the report. You can choose whether this report is private or available to other users.

Once you click SAVE REPORT, that report will show up under your Reports Dashboard. If you selected Add to Favorites, it will be added to your Favorites list.
Creating Subscriptions
If you created a report that you need to frequently share with Contacts, you can create a subscription. For example: A manager needs a list of how many projects their team has requested. You can set up a subscription that will send a report to their email daily, weekly, or monthly.
The report must first be saved for the NEW SUBSCRIPTION button to appear active. Click here to create your subscription.

On the following page, you will be able to choose which Contacts to include, how often the report should be emailed to those Contacts, and at what time. Once you finish those selections, you can click SAVE.
Need to subscribe a report to a person outside of the system? Quickly add them as a Contact and add them to report subscriptions as needed.

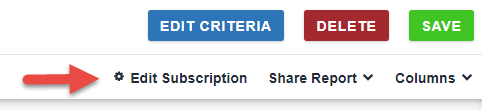
You can always go back to that report and edit who receives those emails or how often by clicking EDIT SUBSCRIPTION.
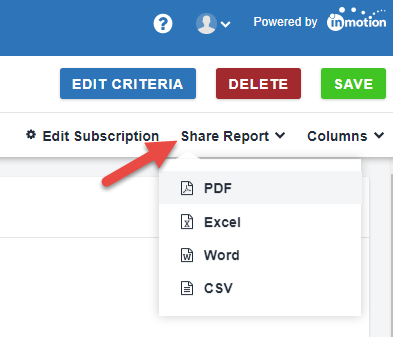
Exporting Reporting Data (Excel, Word, PDF)
Reports can also be exported to Excel, Word or PDF to make it easier to view or share. If you want a read-only view of the report, export it to PDF.
To download your report, Click Share Report in the top right of the screen and choose the desired file type.