
Using Timesheets
Timesheets are a way to track your time worked per task, organized by project.
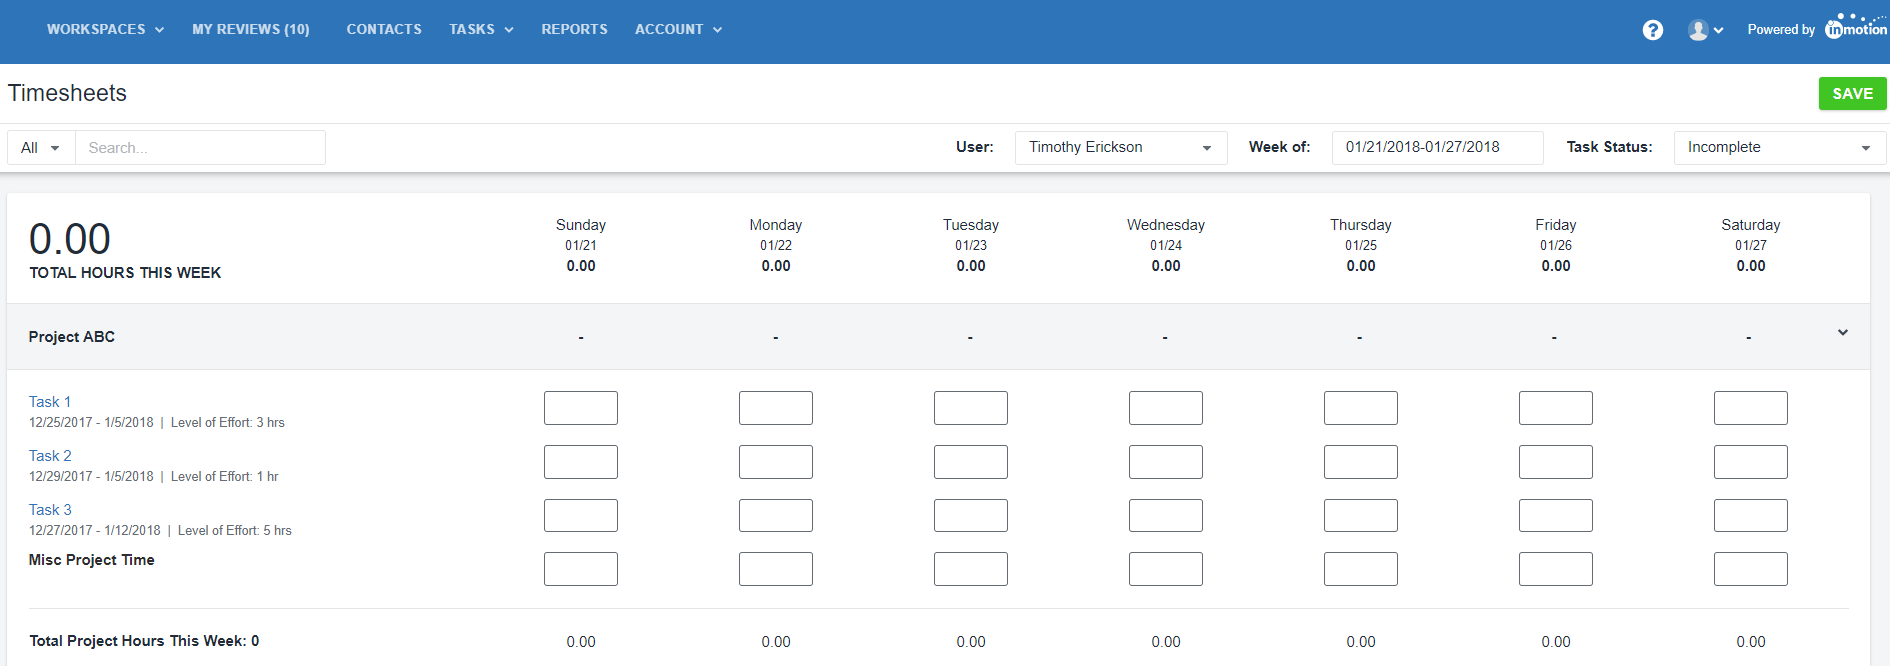
- Navigate to Workspaces > Timesheets.
- If you are assigned to a project as a team member, you will be able to see all existing project tasks on your Timesheet. Start by clicking the project name to see individual tasks.
- Now, you can enter in the amount of time that you have spent on project tasks per week in an easy to use, summarized view.

Using Schedule Timers
Task timers provide a convenient way to track your time spent per task while you are actively working on a project.
- Navigate to the relevant Project Dashboard.
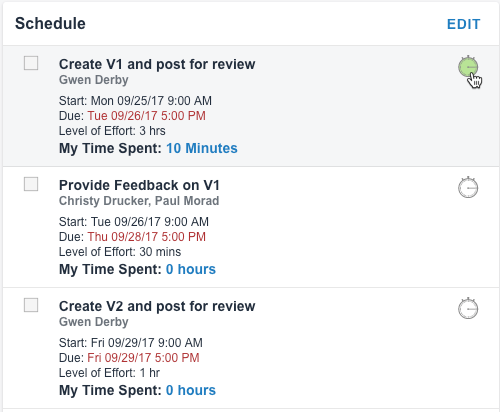
- Next to each task in the Schedule column, you will find a stopwatch icon. You can start and stop the timer by clicking here. Note: When the timer is on, the stopwatch will have a green background and the My Time Spent counter will continue to increase.
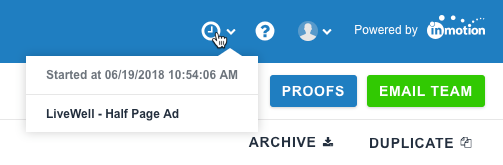
- If a timer is running, a clock icon will also display in the right-hand side of the navigation bar so that you can keep track of your time if you navigate away from the relevant project. Simply click the icon to see the project name with a running timer. Select the project name to navigate back to the project.
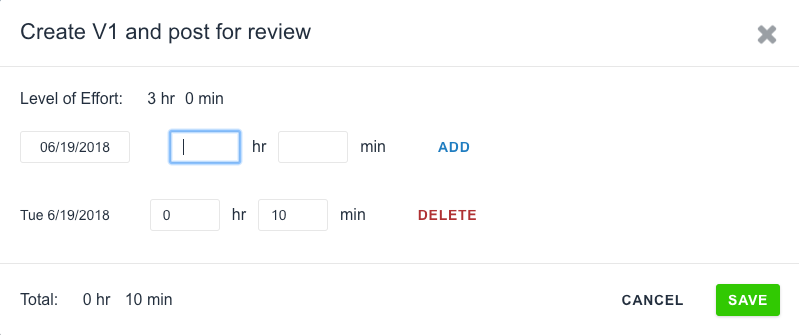
- If the time needs to be adjusted, you can click on the task link for My Time Spent and add or remove time spent on the task.
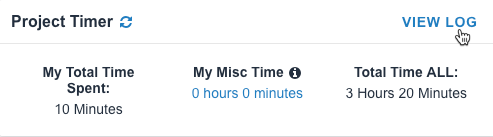
- The total time spent on the project per user and per project is displayed on the bottom left-hand side of the Project Dashboard page under Project Timer. From here you can also view a log of all time entries made to the project.


My Tasks
If you prefer to see a list of all your assigned tasks at once, you can utilize the My Tasks view to quickly add time across multiple projects.
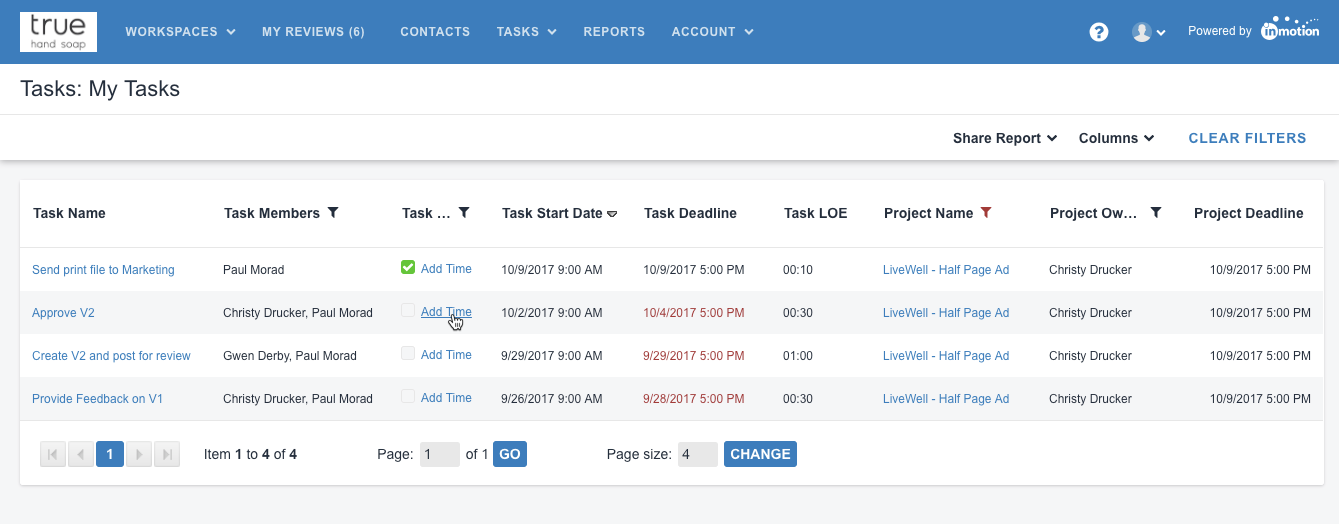
- Navigate to Tasks > My Tasks.
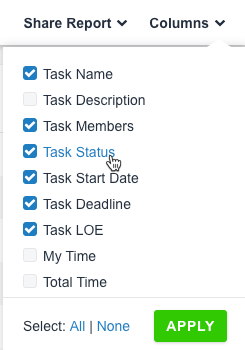
- Be sure to enable the Task Status column.
- From the Task Status column, click Add Time to enter task time.
- Enter the date, hour(s) and minute(s) and click ADD to create the entry. Click SAVE to exit.


