
Complete the following tasks to experience the basic features of the three major aspects of inMotion.
Job Launch
Submit a Job Launch Request Form
- Hover over Workspaces and click My Job Launches.
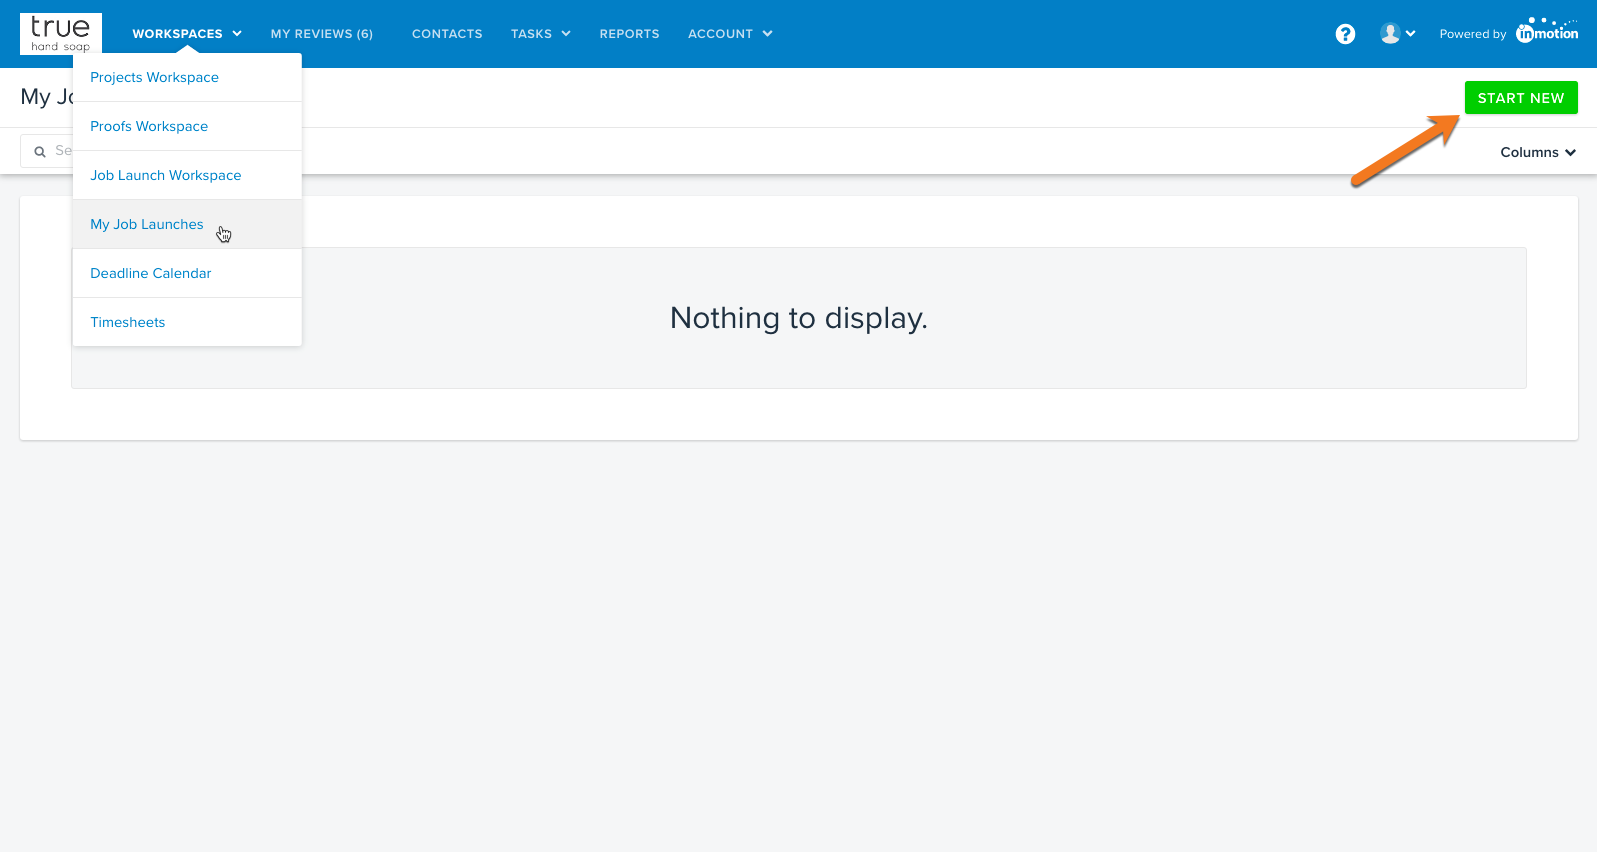
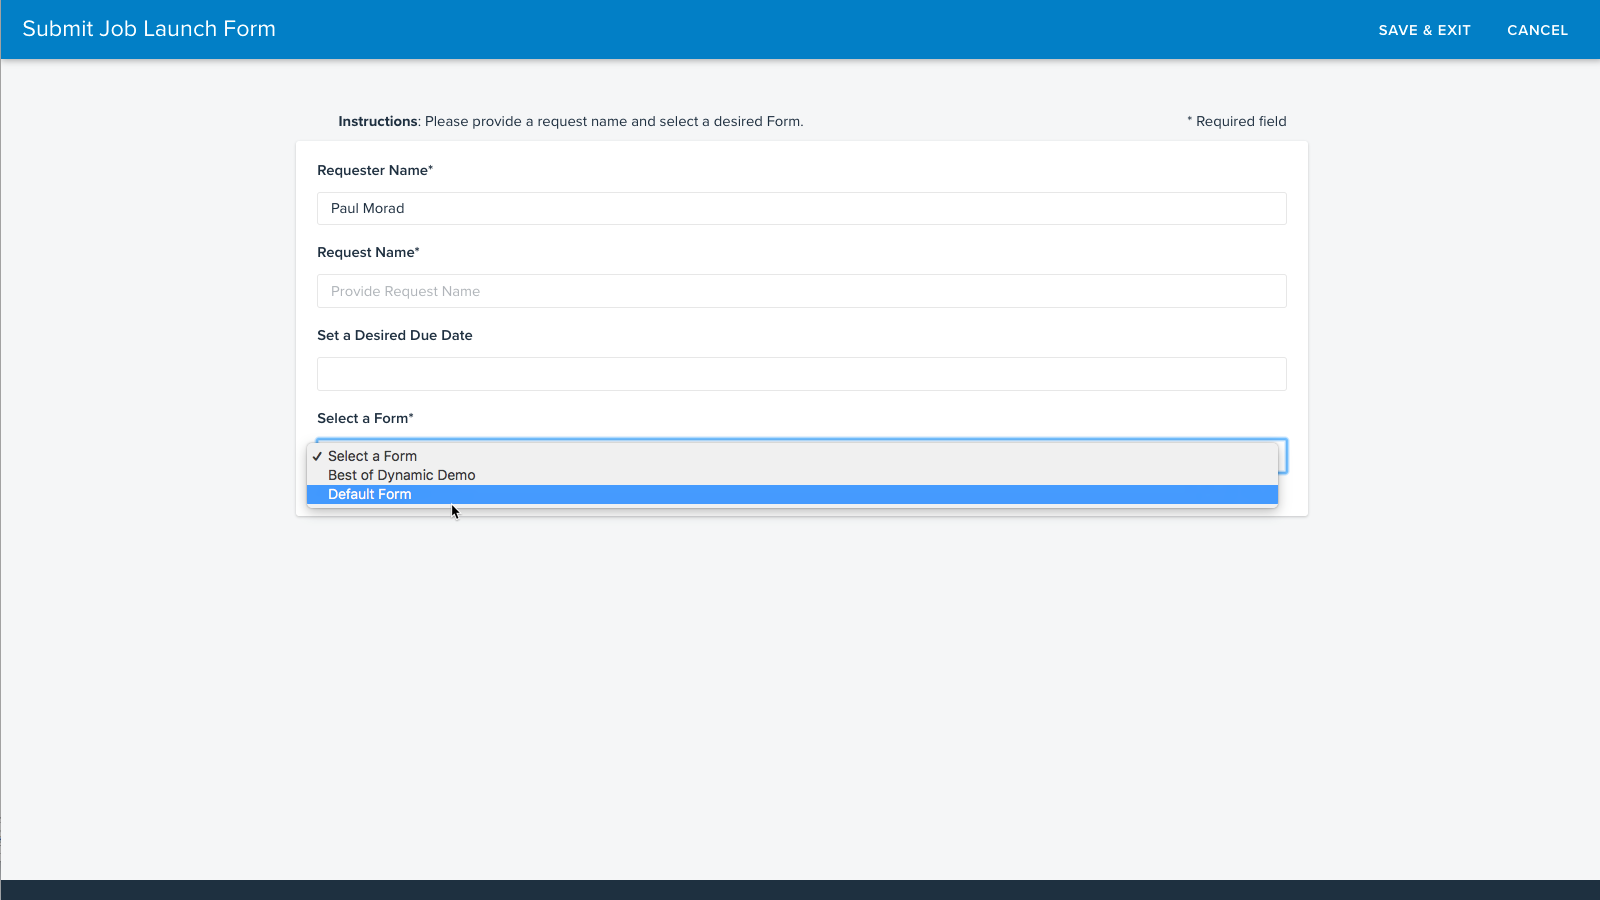
- Click START NEW to select the Default form and submit your test request.


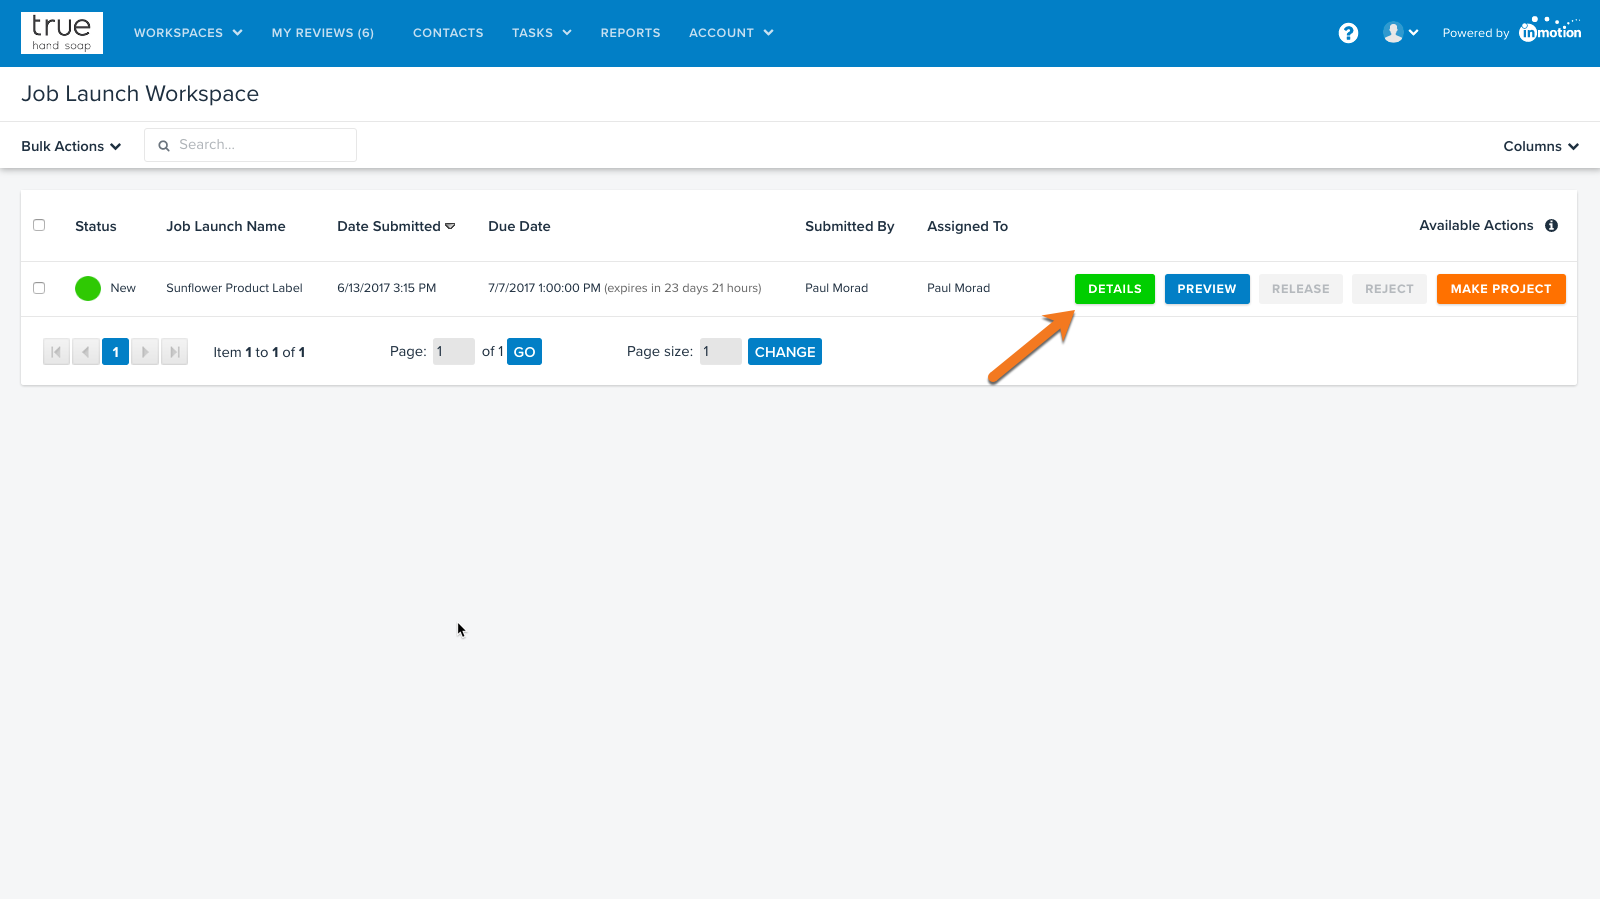
Manage Job Launch Requests
- Hover over Workspaces and click Job Launch Workspace and click the DETAILS button next to your request.
- Open the request by clicking View in the 'Job Launch Details' section. From here you can download a PDF copy of the request.
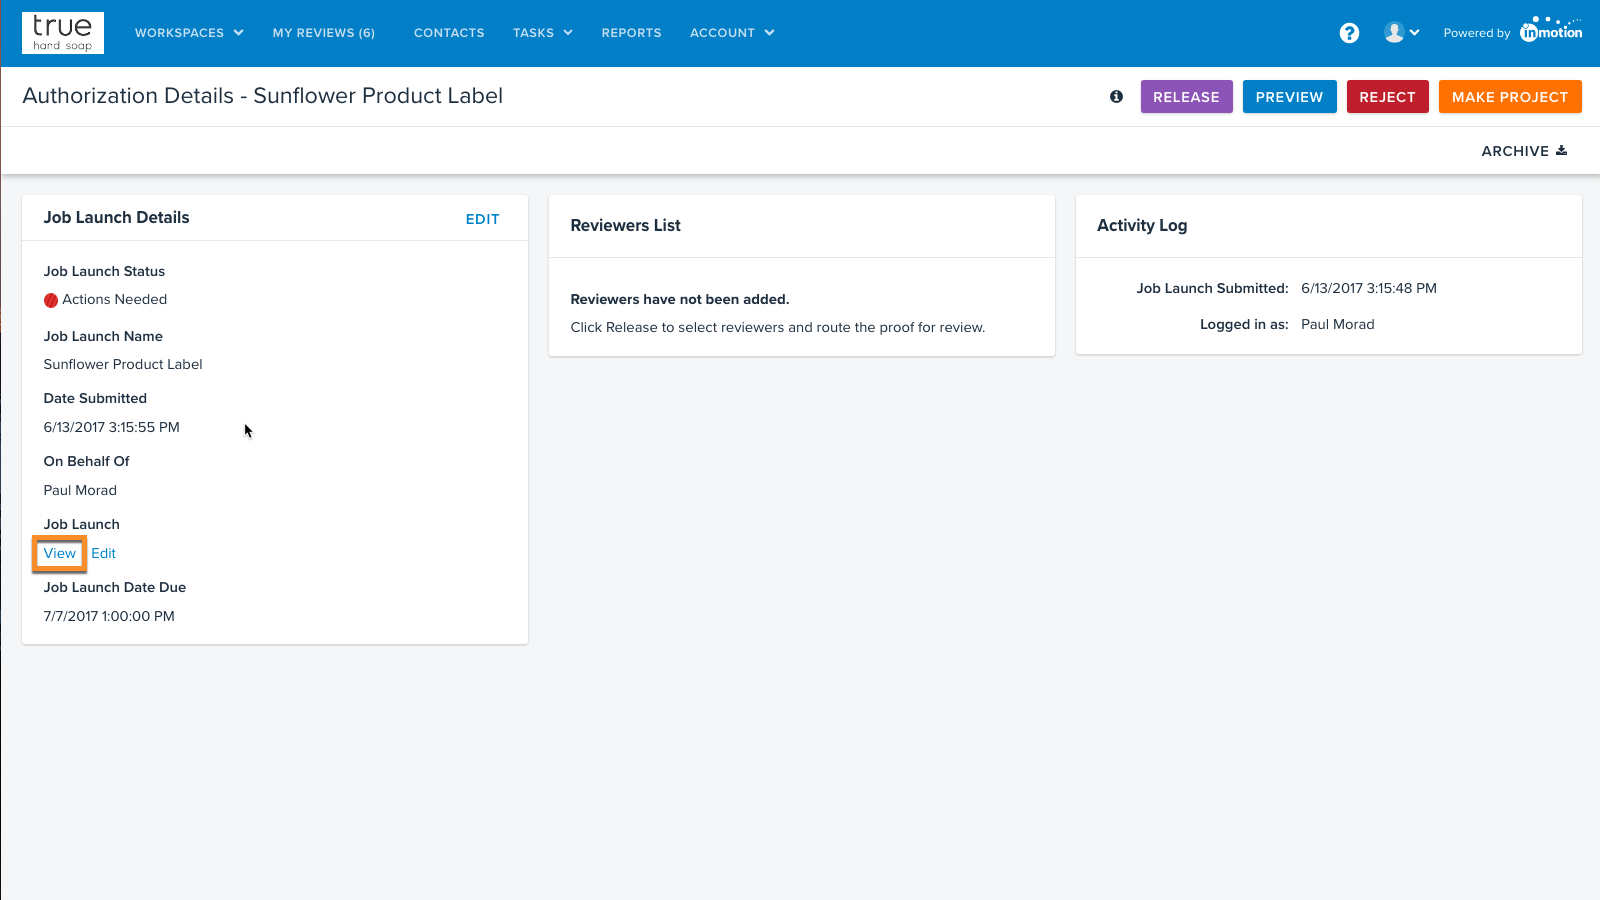
- Approve the request by clicking the MAKE PROJECT button in the top right of the Job Launch Workspace.
- Enter any sample project details (description, start date, etc.)
- Click CREATE & NOTIFY to create your project.
Note: This notifies the Job Launch Submitter that the request was approved and the project is kicked off.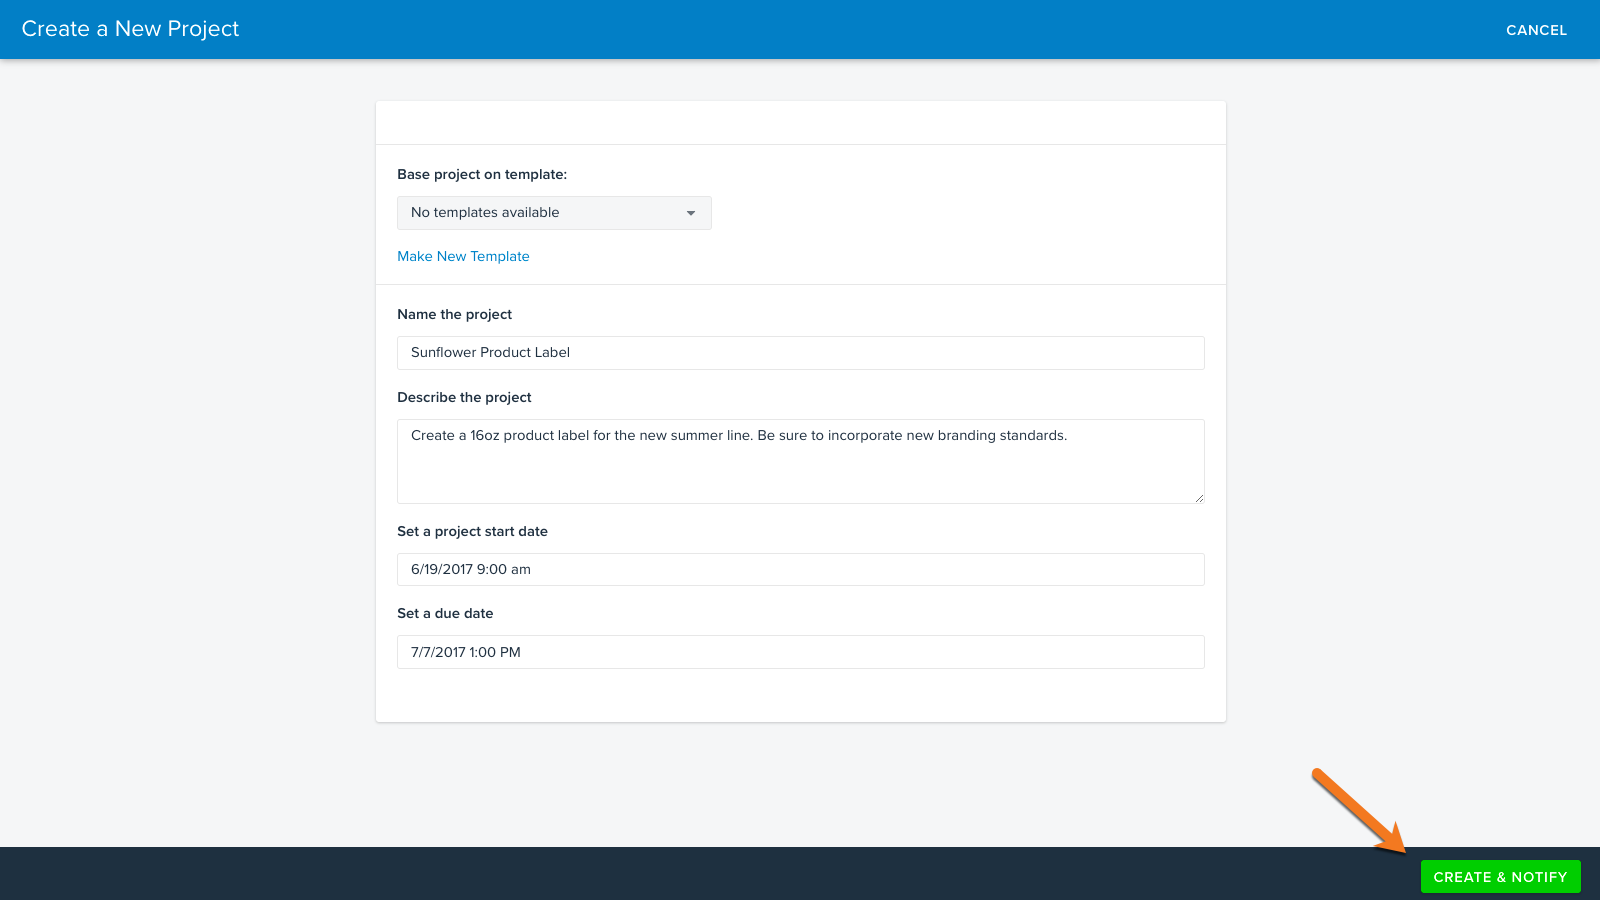


Project Management
Manage Projects
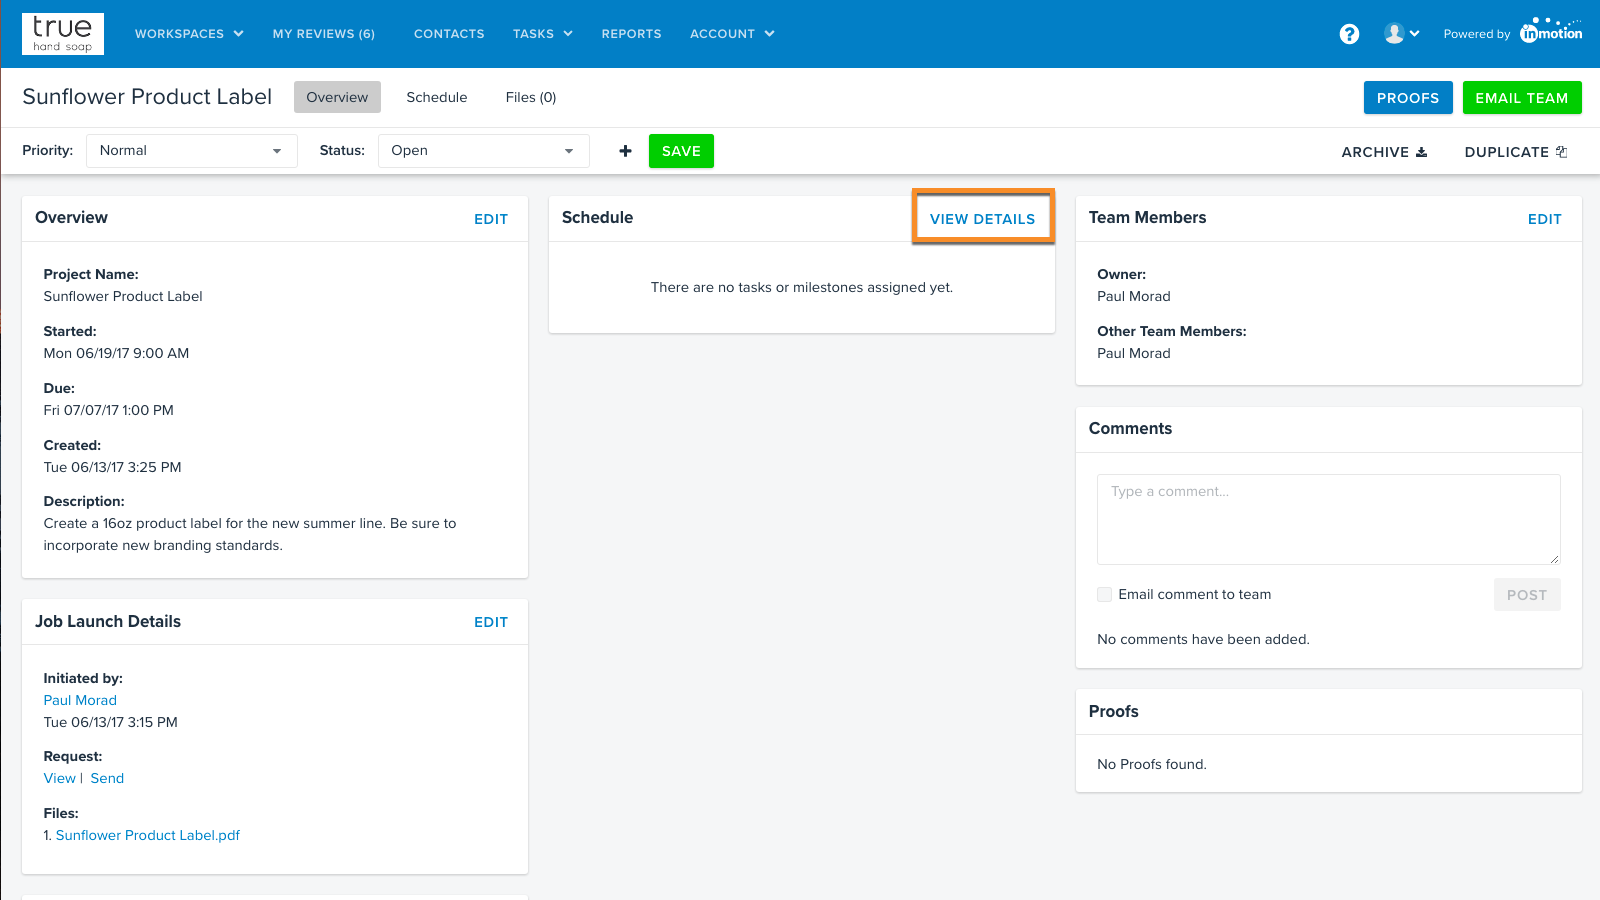
- After creating the project from the request, you should now see the project info on the Project Dashboard.
- Click VIEW DETAILS in the 'Schedule' column to create sample tasks and milestones and assign them to team members on the project.
- Click the link to 'Add the first one' to begin task creation.
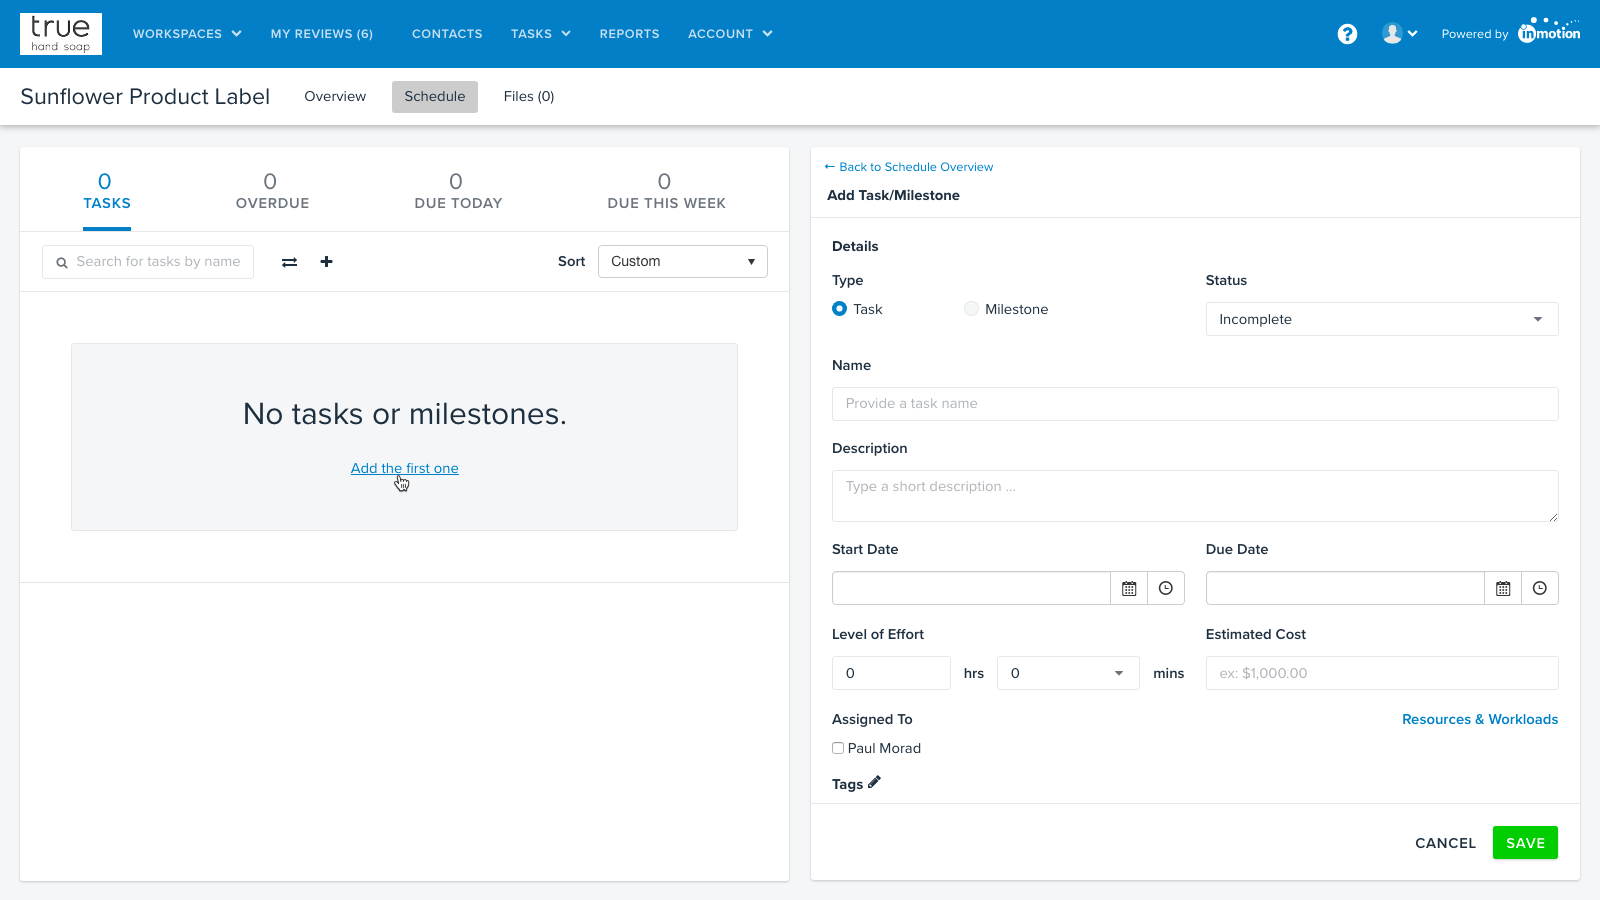
Note: You can utilize the Resource Allocation capability, if you include a project start/due date and level of effort (LOE) for each task. - Once you save your first task, click the pencil next to 'Project Owner' or 'My Team' to change the Project Owner or add/remove team members.
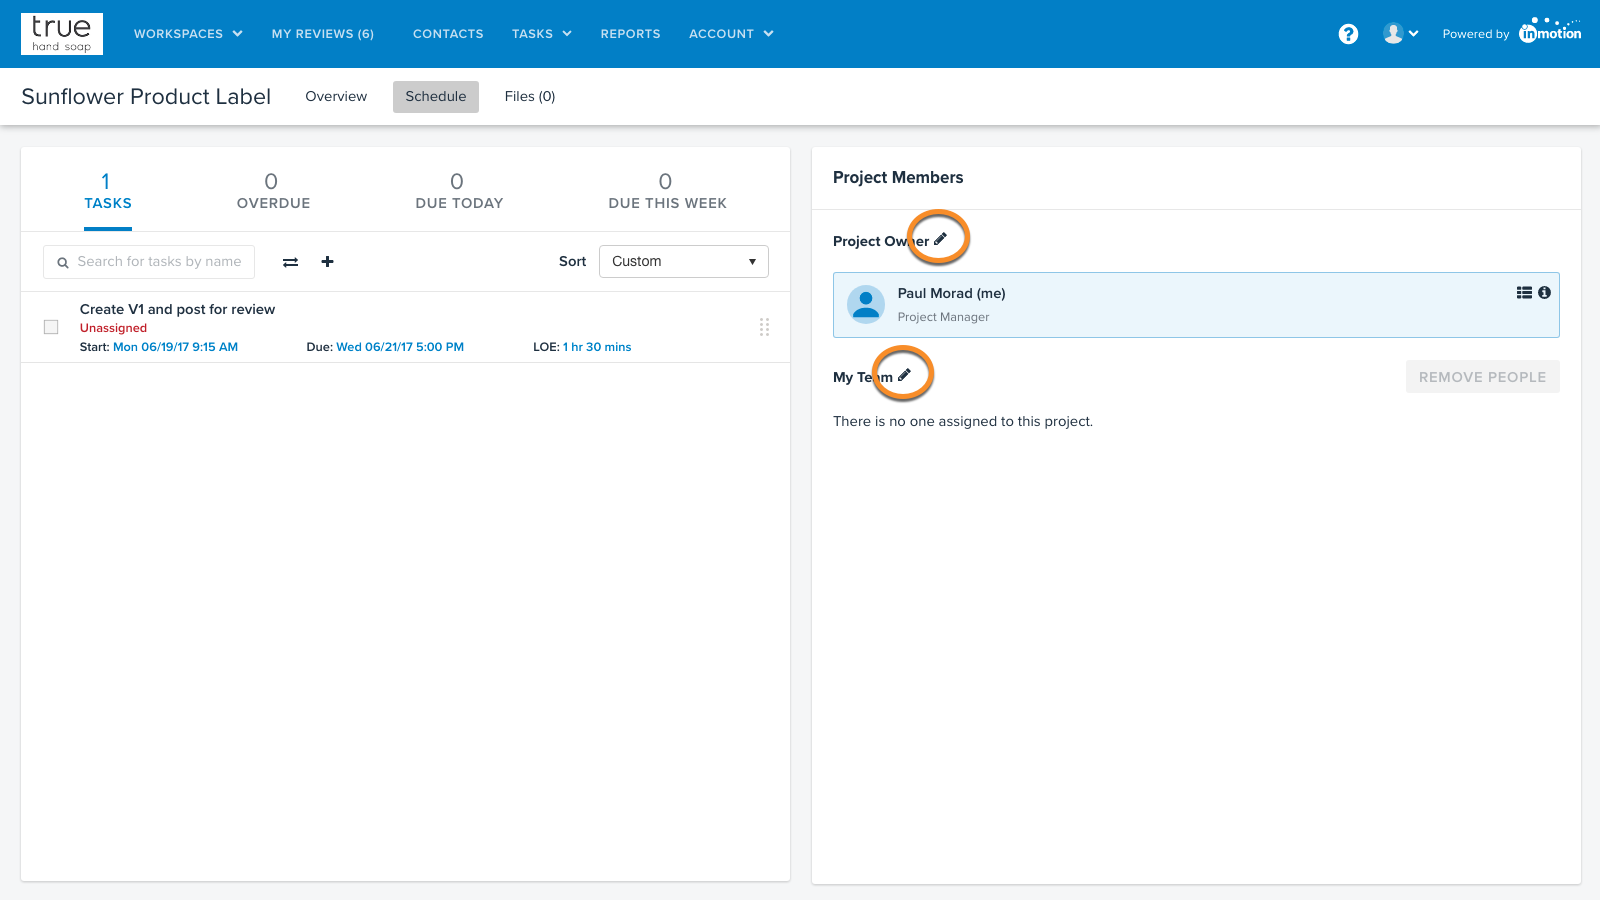
- Select Overview to navigate back to the Project Dashboard for your project. Complete the tasks by checking them off, enter time spent on task and click SAVE.
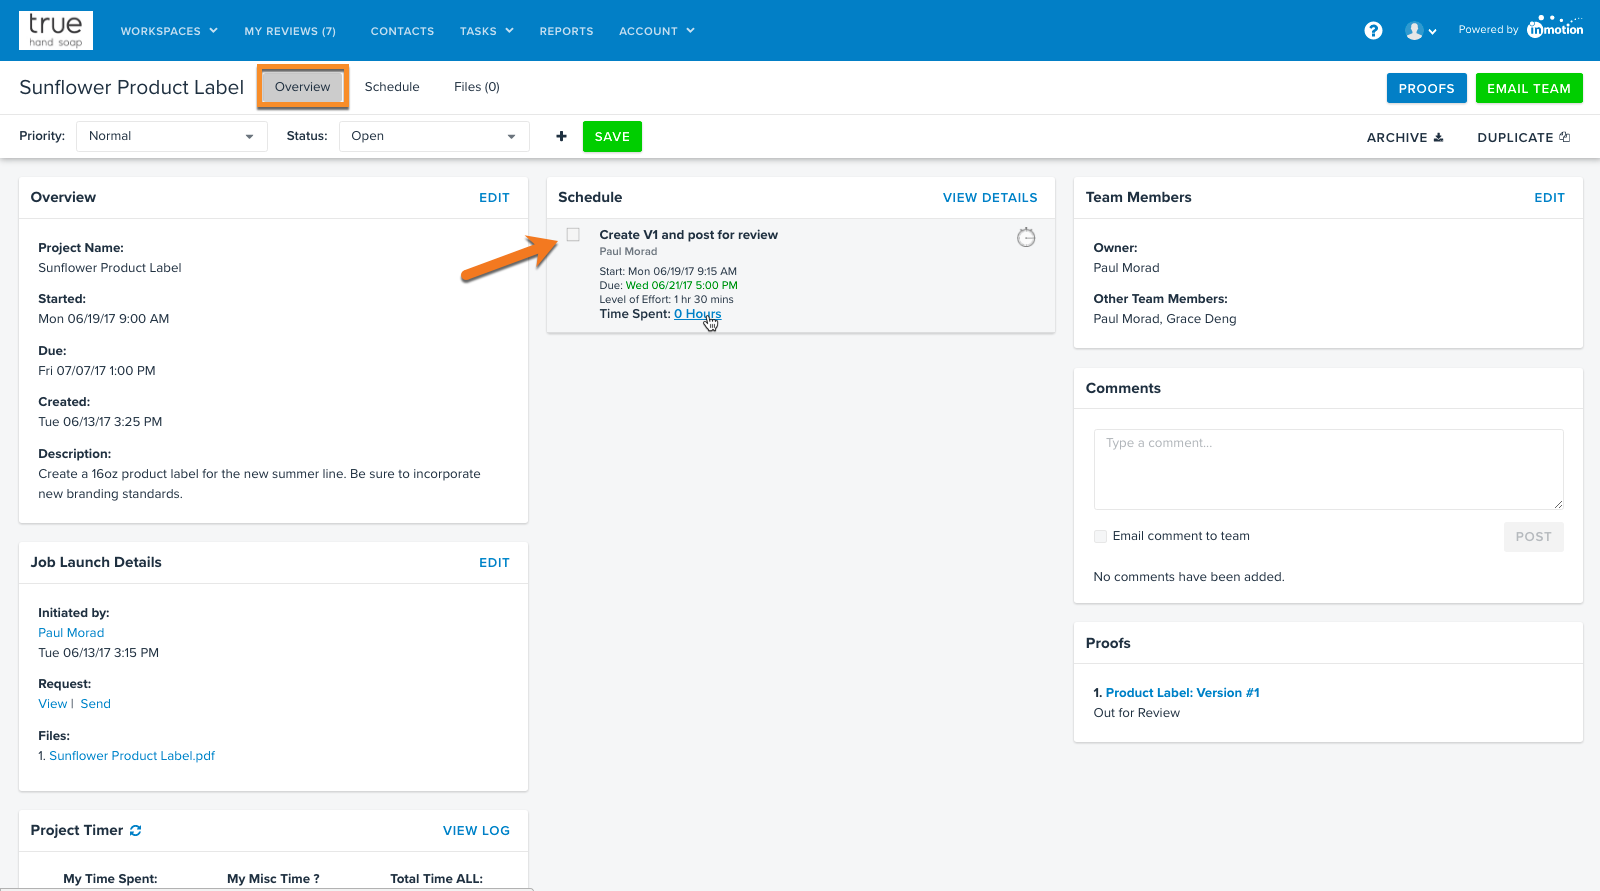


Review and Approval
Post a New Proof
- From the Overview section of the Project Dashboard, click the PROOFS button in the top right.
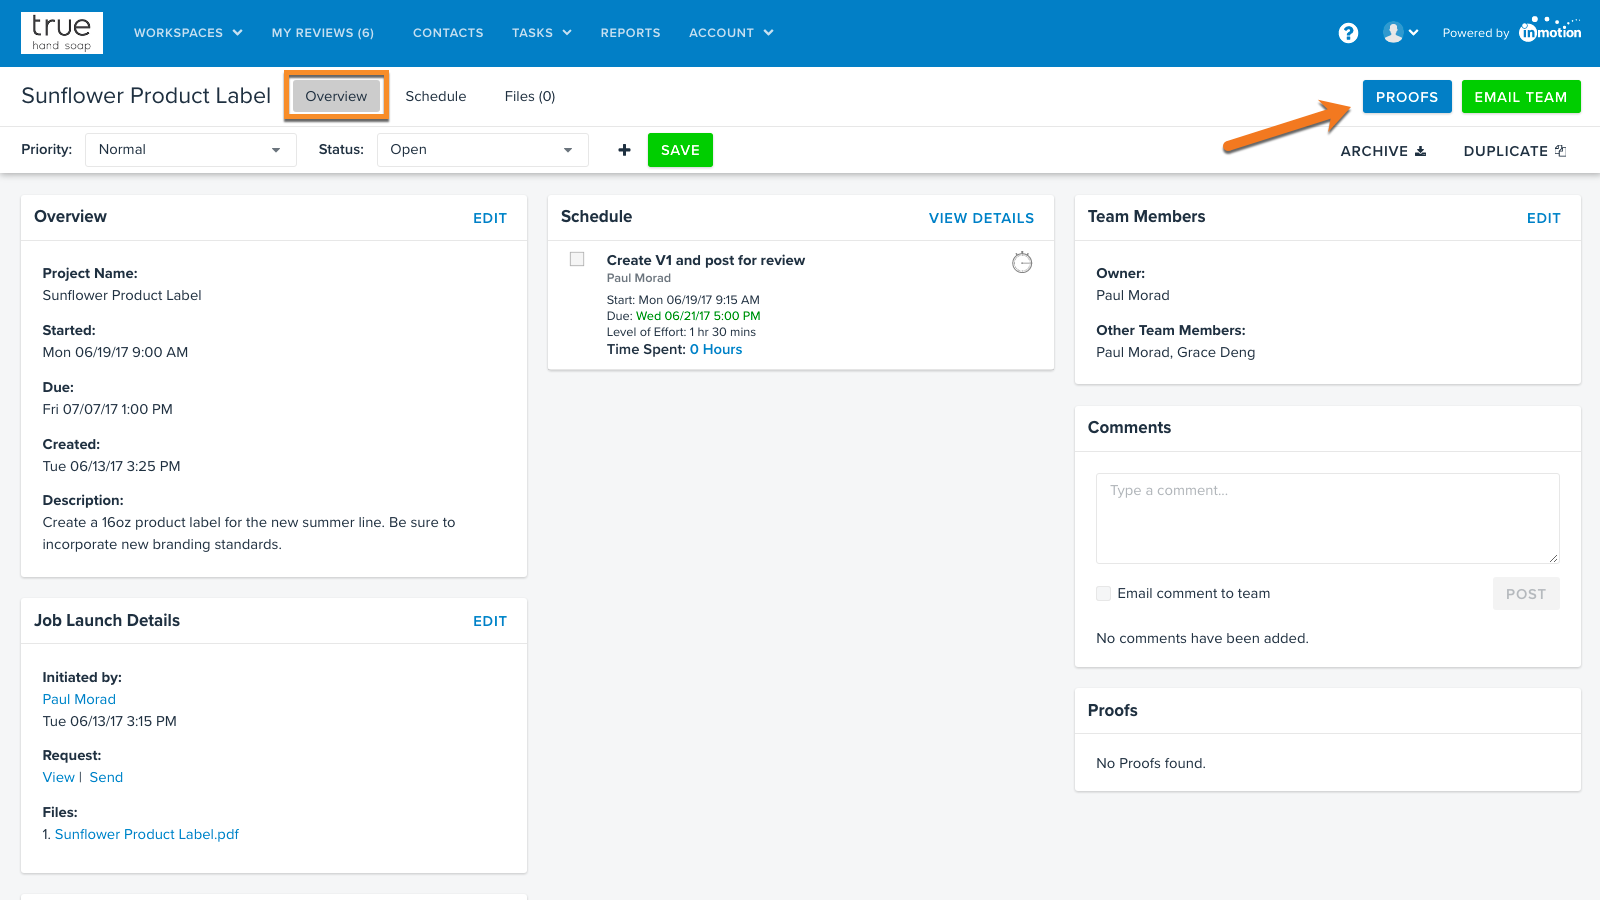
- Click POST CONTENT FOR REVIEW to add assets for review to your project.
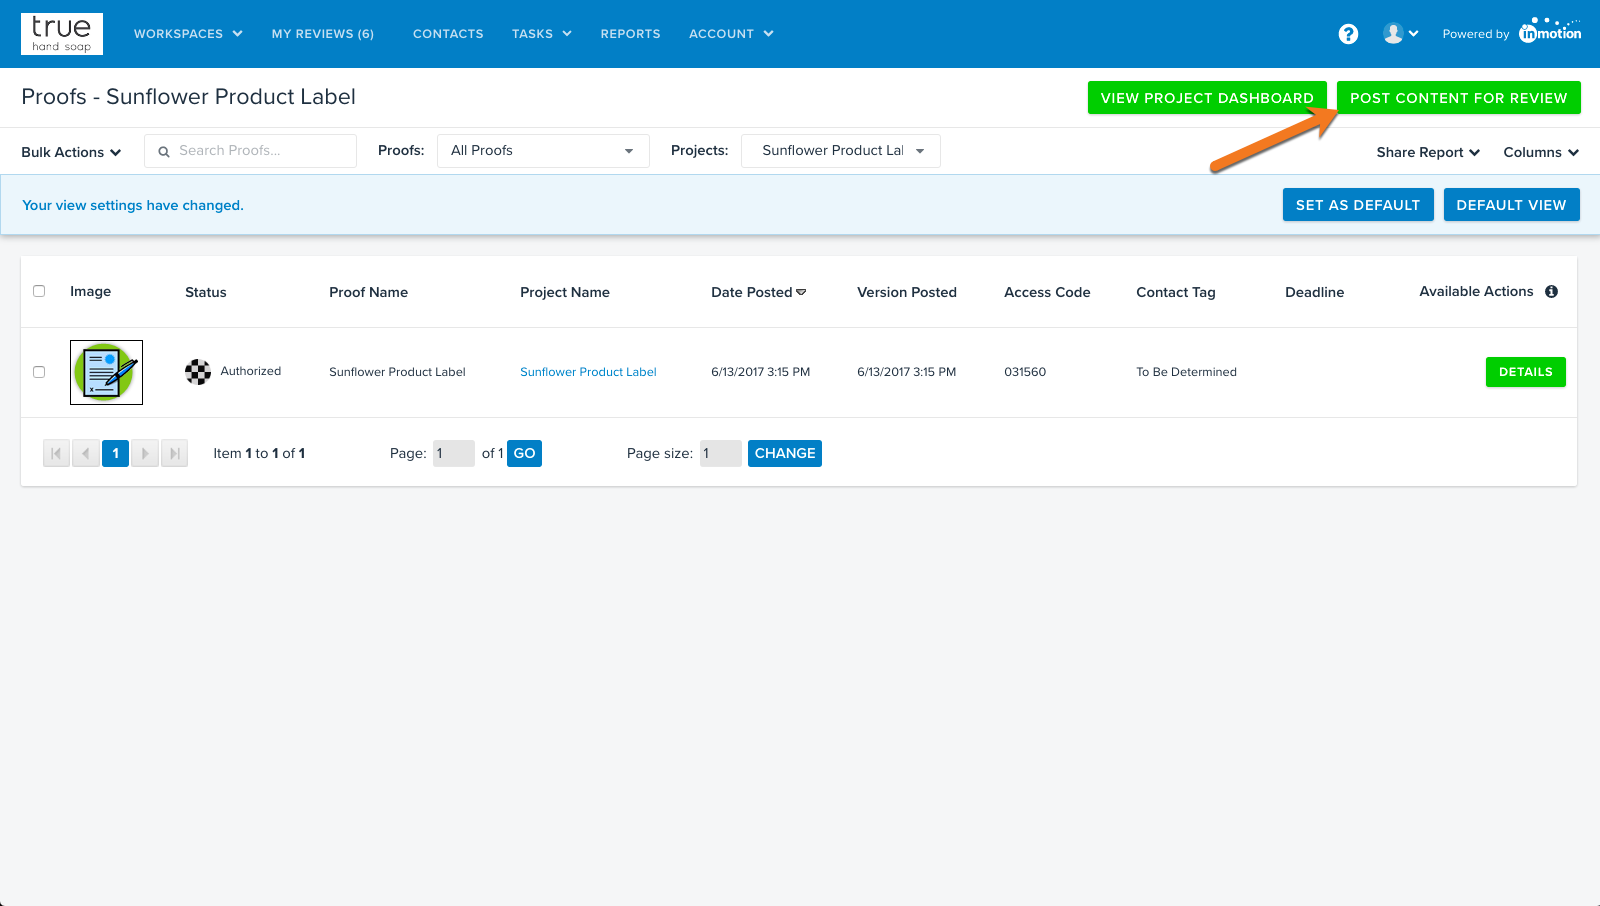
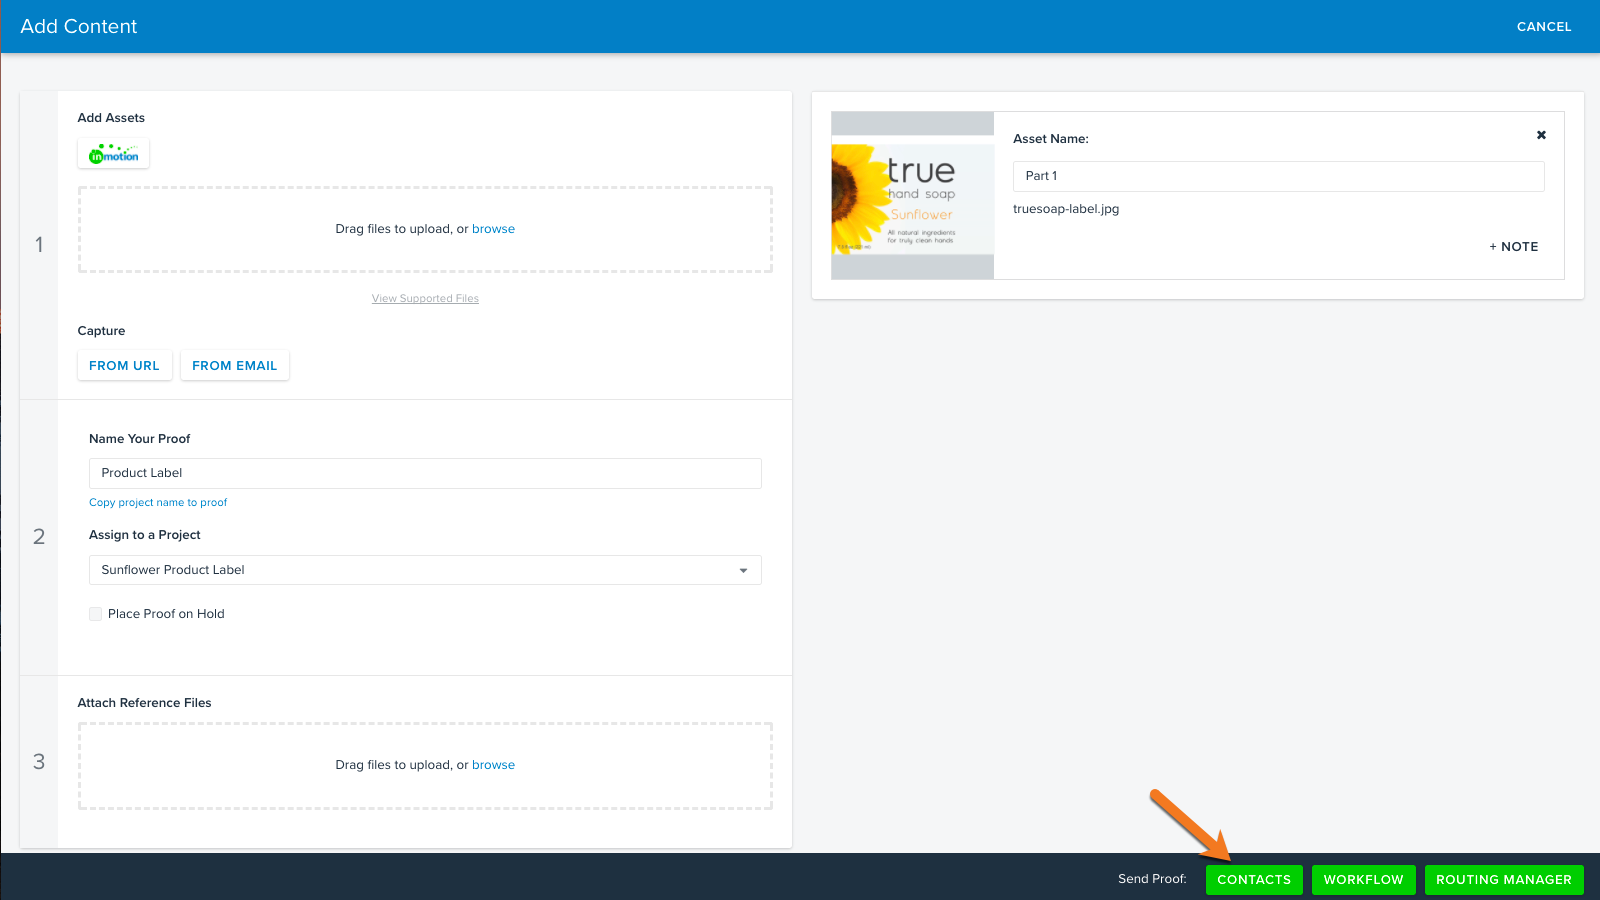
Note: Another way to route content is by hovering over Workspaces and clicking Proofs Workspace. From there, click the same POST CONTENT FOR REVIEW button. - In Step 1 of the Add Content page, select your file(s) using one of the available selections. Your file will begin the upload progress in the right hand column. If you have a multiple page document, you will see each page load as a separate asset. You can name each asset/page accordingly.
- In Step 2, enter a name for your proof.
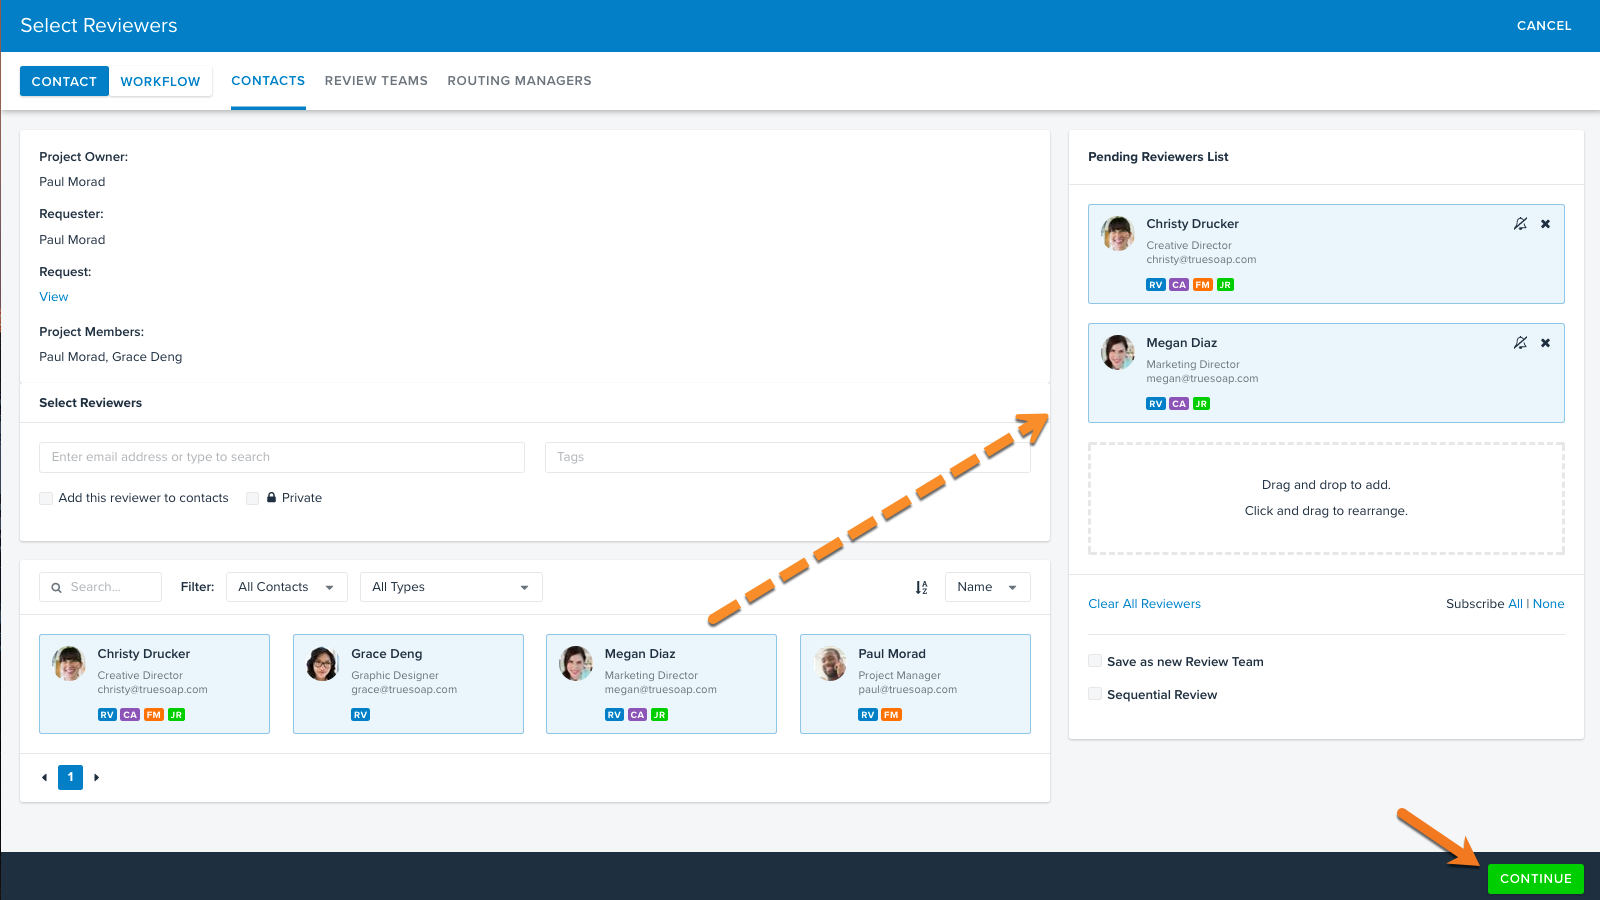
- When you're ready to proceed, select CONTACTS in the bottom right of the page.
- Drag and drop the applicable reviewer contact cards to the Pending Reviewers List on the right. This will notify the chosen contacts of a proof available for review. Be sure to include yourself! Click CONTINUE in the bottom right to proceed.
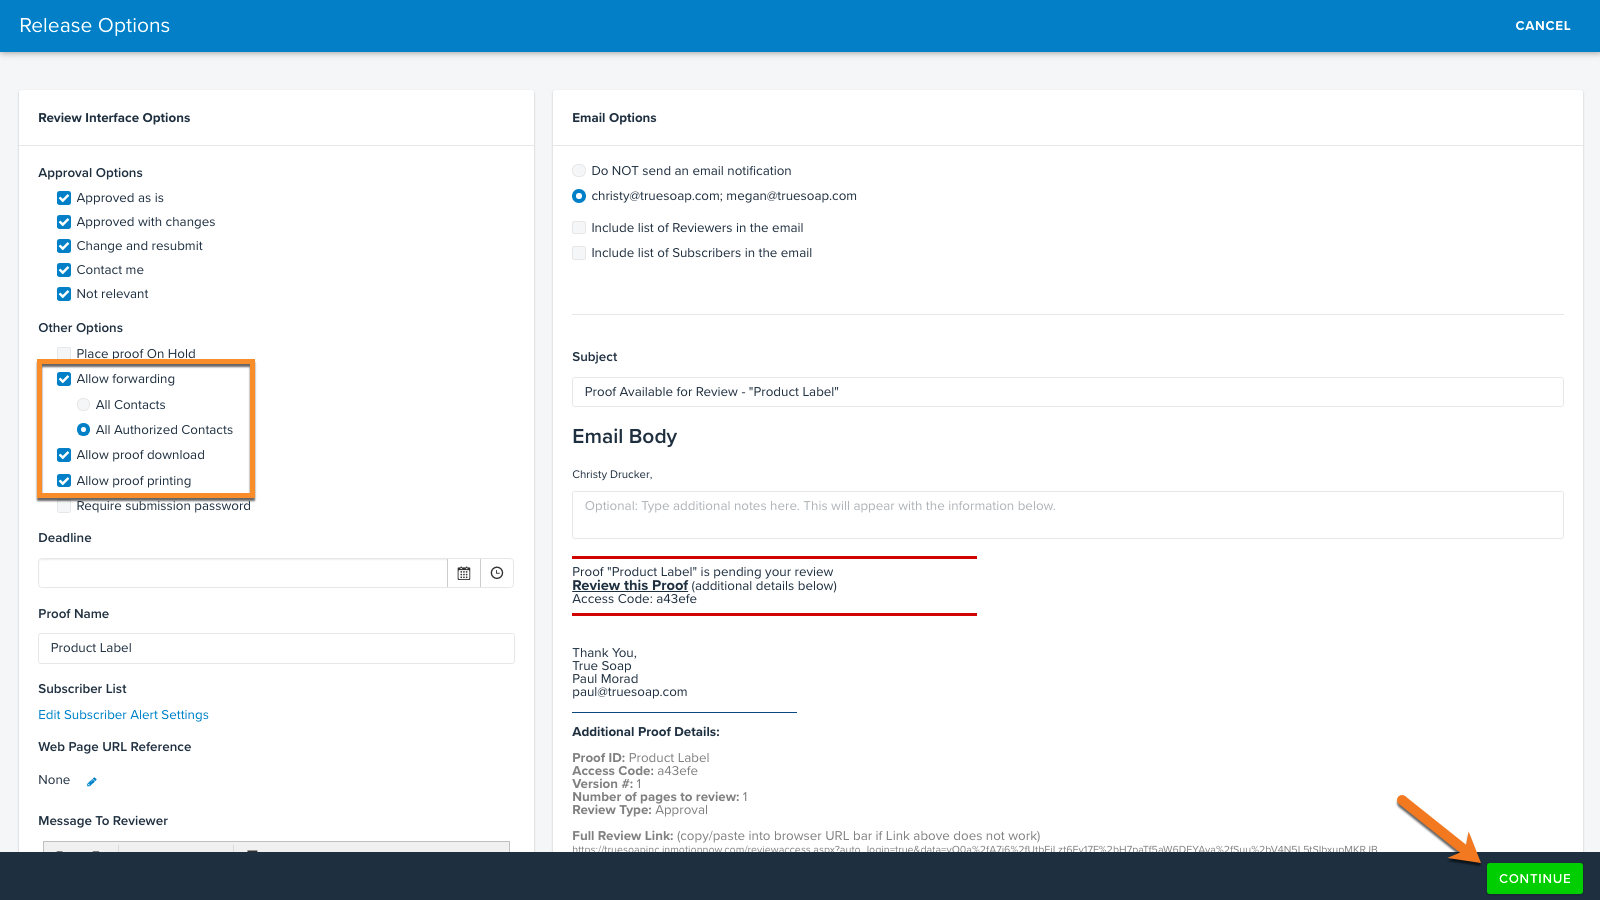
- On the Release Options page, be sure to select 'Allow Forwarding' and 'Allow Proof Download' if you would like to test these features in the review environment. Click CONTINUE to proceed.
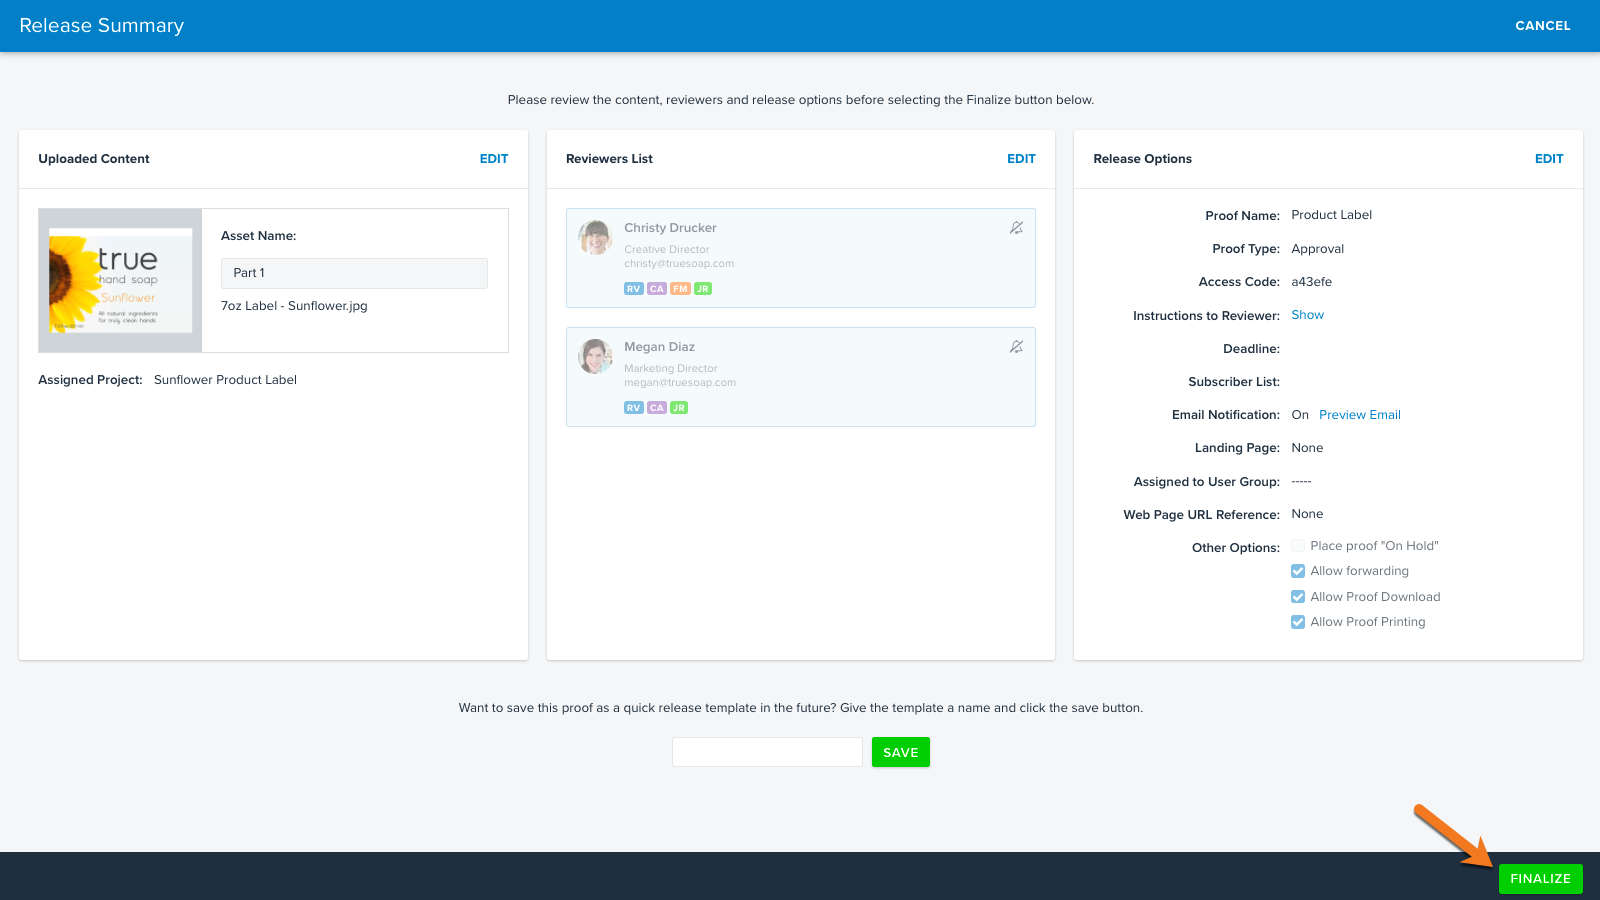
- On the Release Summary page, click FINALIZE to post the proof.


Review a Proof
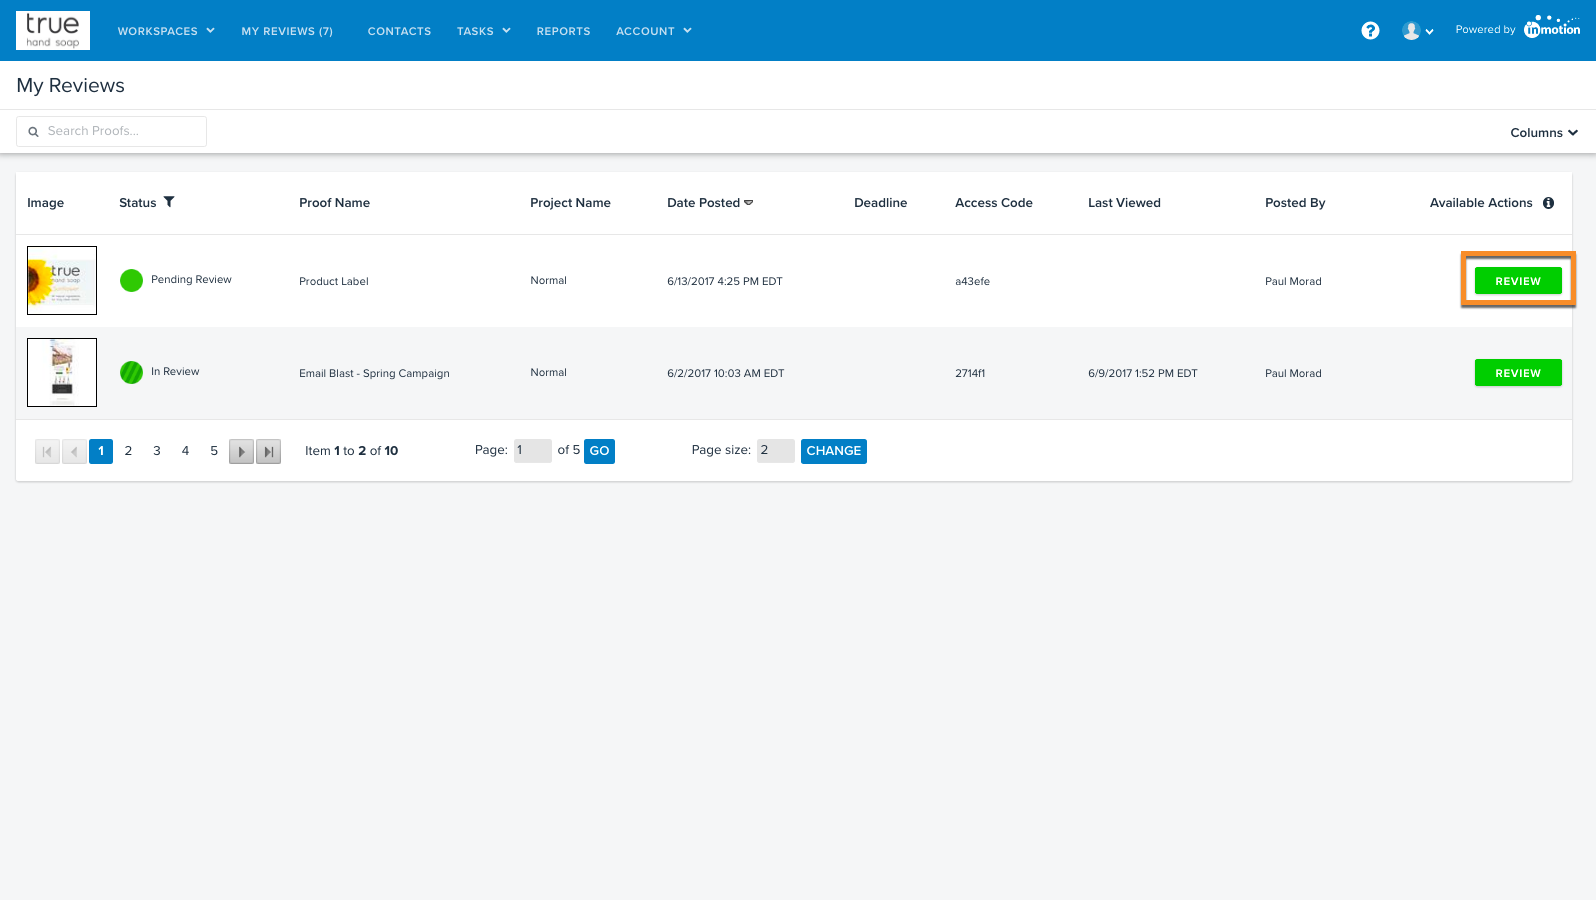
- To access the posted proof as a reviewer, you can either:
- Use the link in the 'Proof Available for Review' email notification you received.
- Navigate to My Reviews and click on the REVIEW button to the right of your listed proof.
- Leave comments and/or annotations, and select an approval status for each page of the review. Refer to our Introduction to Review + Approval to learn more about the available features of the review environment.
- Confirm and submit your review to finish.

Review the Feedback
- Hover over Workspaces and click Proofs Workspace. Locate the proof you submitted for review.
Note: You can see either the Proof ID or Access Code located in the email. - Click the REVIEWS button to the right of the proof.
- This will enter you into a read-only mode of the review where you can view the submitted feedback.
Post New Version for Review
- From the Proofs Workspace, click the +VERSION button to the right of the proof and add your updated content.
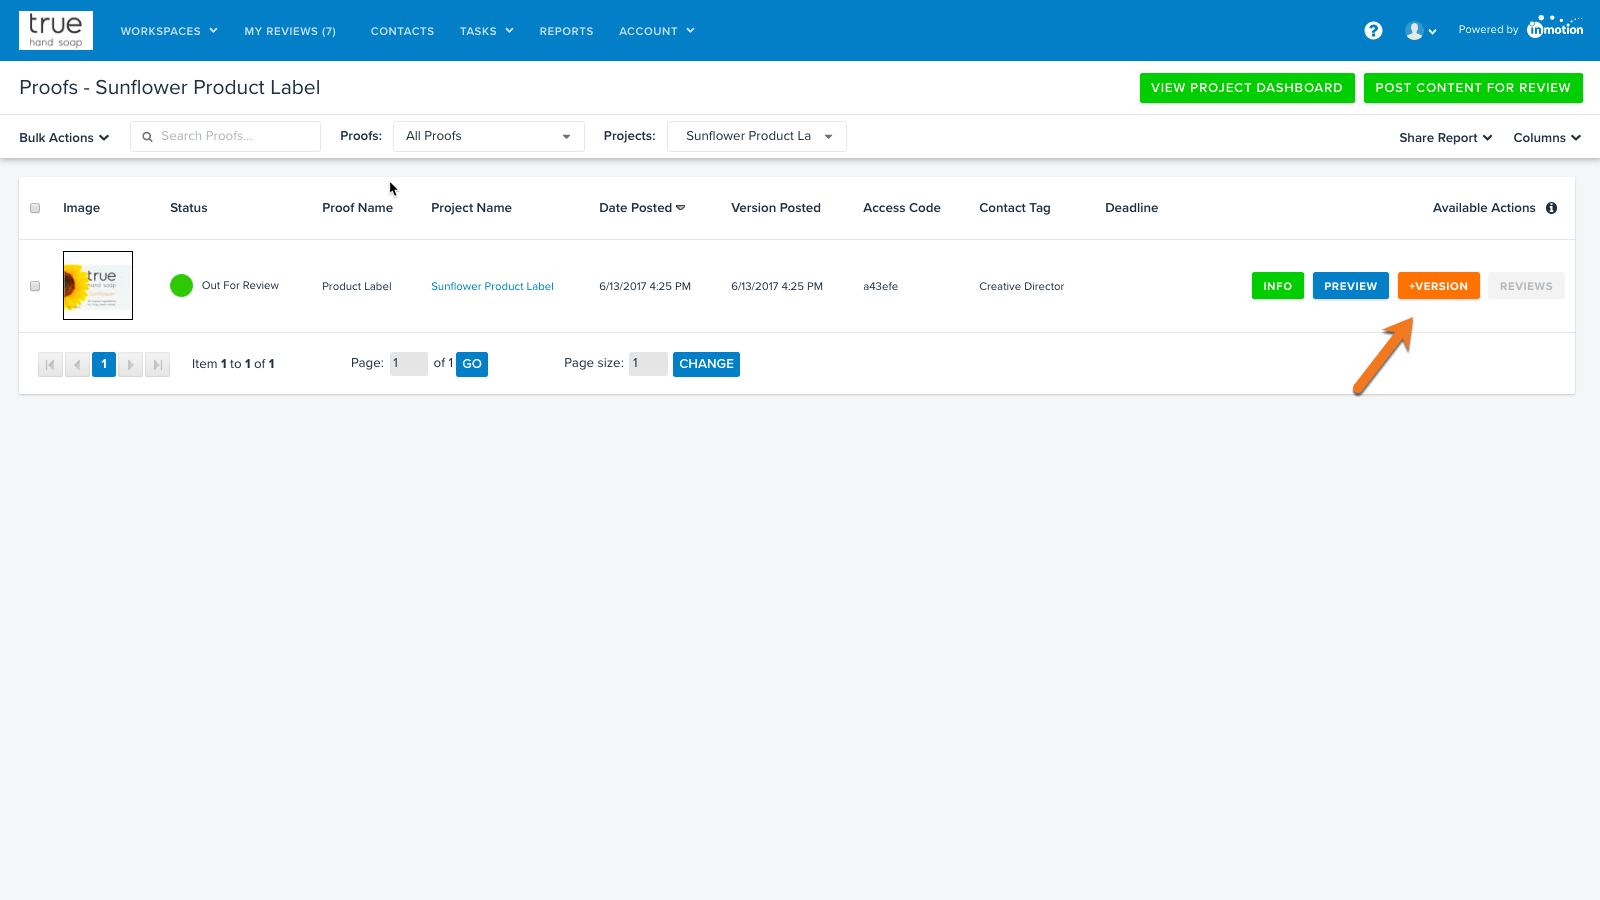
- Click RELEASE NOW in the bottom right to send the new version to the same reviewers.
- Navigate to My Reviews to access the review for version 2.
Note: Once you enter the review environment, you’ll see a Previous Version button located on the top left hand side of the review environment. Click the button, and the previous version will open in a new tab of your browser. - Confirm and submit your review to finish.

Repeat all steps as many times as necessary to gain familiarity with the basics of inMotion! Keep a consolidated document with all questions to review with your Customer Success representative.
Next Steps!
Email your Customer Success representative to schedule the Feature Review Call. When you schedule check-in calls with us, we commit to having enough time available to serve you. That affects how many other customers we can serve that day. For that reason, if you need to adjust the time or reschedule the call, please let us know 24 hours in advance.