
What is a Routing Manager?
If a contact needs permission to route a proof, i.e. choose the reviewers or workflow for a proof, you can apply contact permissions that allow them to act as a Routing Manager. With Routing Manager permissions, the contact will receive unique login credentials and a Routing Manager workspace. When uploading proofs, you can choose to release the proof to a Routing Manager and they will receive an email notification to route the proof as necessary.
Users of inMotion cannot act as Routing Managers. Both Admin and Staff users can route proofs natively with their user permissions. We recommend only using this contact permission in specific use cases. Learn More
Enabling Routing Manager Permissions
- Navigate to the Contact Management workspace and select the applicable contact record.
- From the Contact Editor, check to 'Enable as Routing Manager.'
- Contacts Access - By default, a routing manager does not have access to any contacts, review teams or workflows saved on your account. If you check 'Add owner's non-private contacts' this will give the Routing Manager access to any non-private contacts, review teams and workflows that are owned by to the same user that is the owner of the Routing Manager contact record.
- Original File Access - This option allows you to give Routing Manager access to the original proof files in their workspace. You can access limit by proof status as well.

- Provide the Routing Manager with login credentials. Click RESEND CREDENTIALS to have the credentials emailed to the contact.
- Click SAVE.

Uploading a Proof to a Routing Manager
- On the Add Content screen, upload the proof files as normal and select ROUTING MANAGER to proceed.

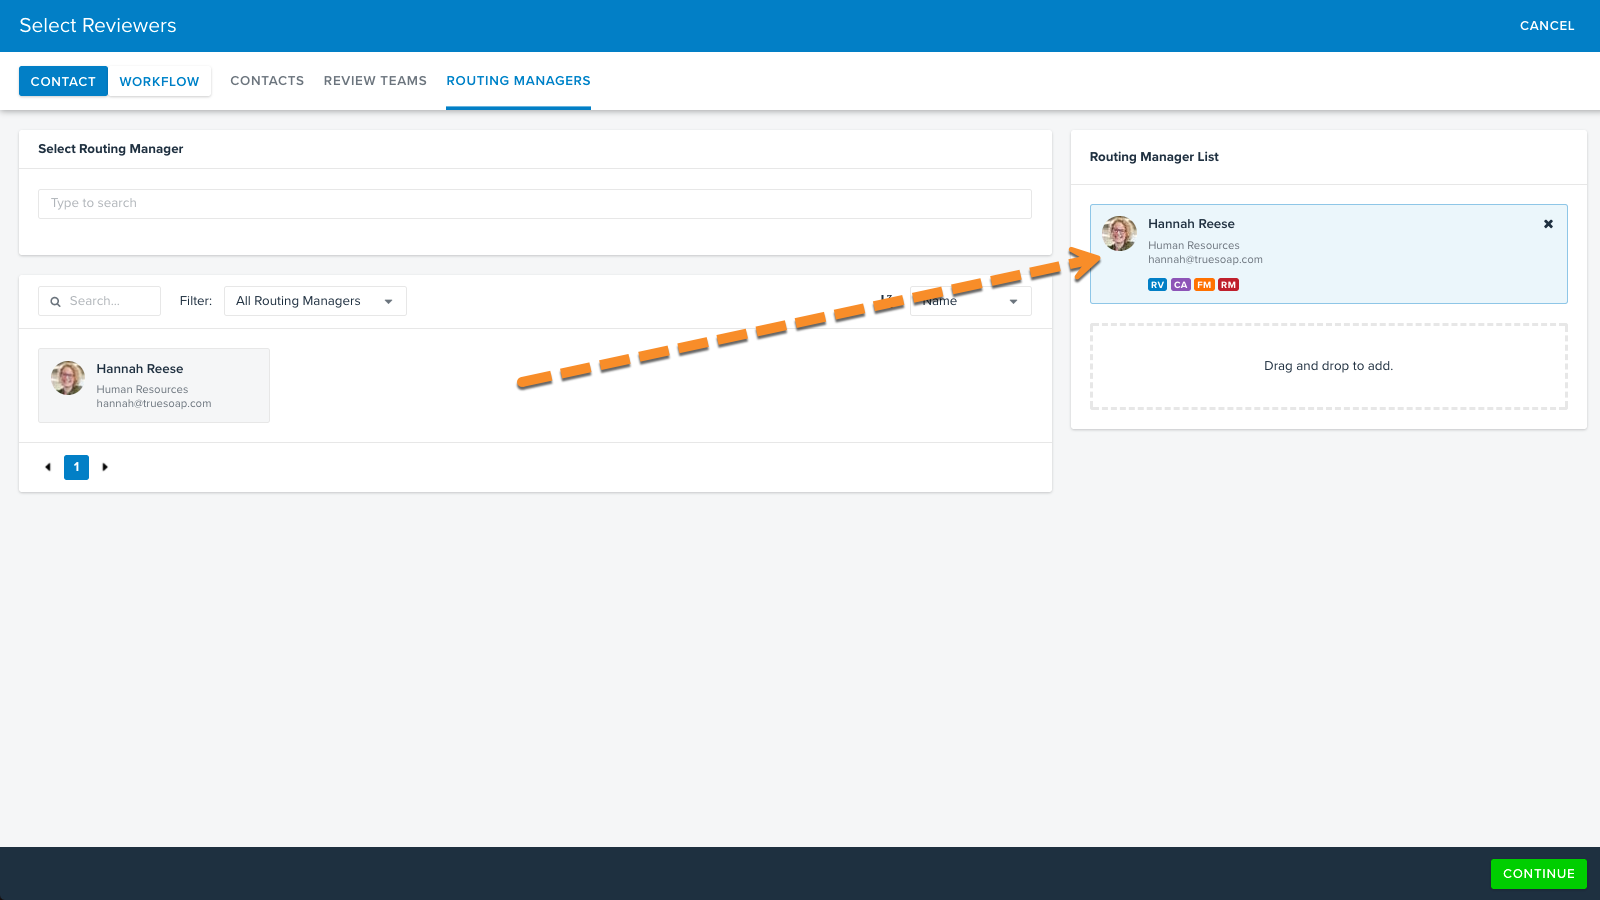
- Drag and drop the applicable routing manager to the list on the right hand side. You can add multiple Routing Managers if more than one person is appropriate for releasing the proof. Click CONTINUE.
- Customize your Proof Release Options as necessary and click CONTINUE.
- FINALIZE your proof.


Releasing a Proof as a Routing Manager
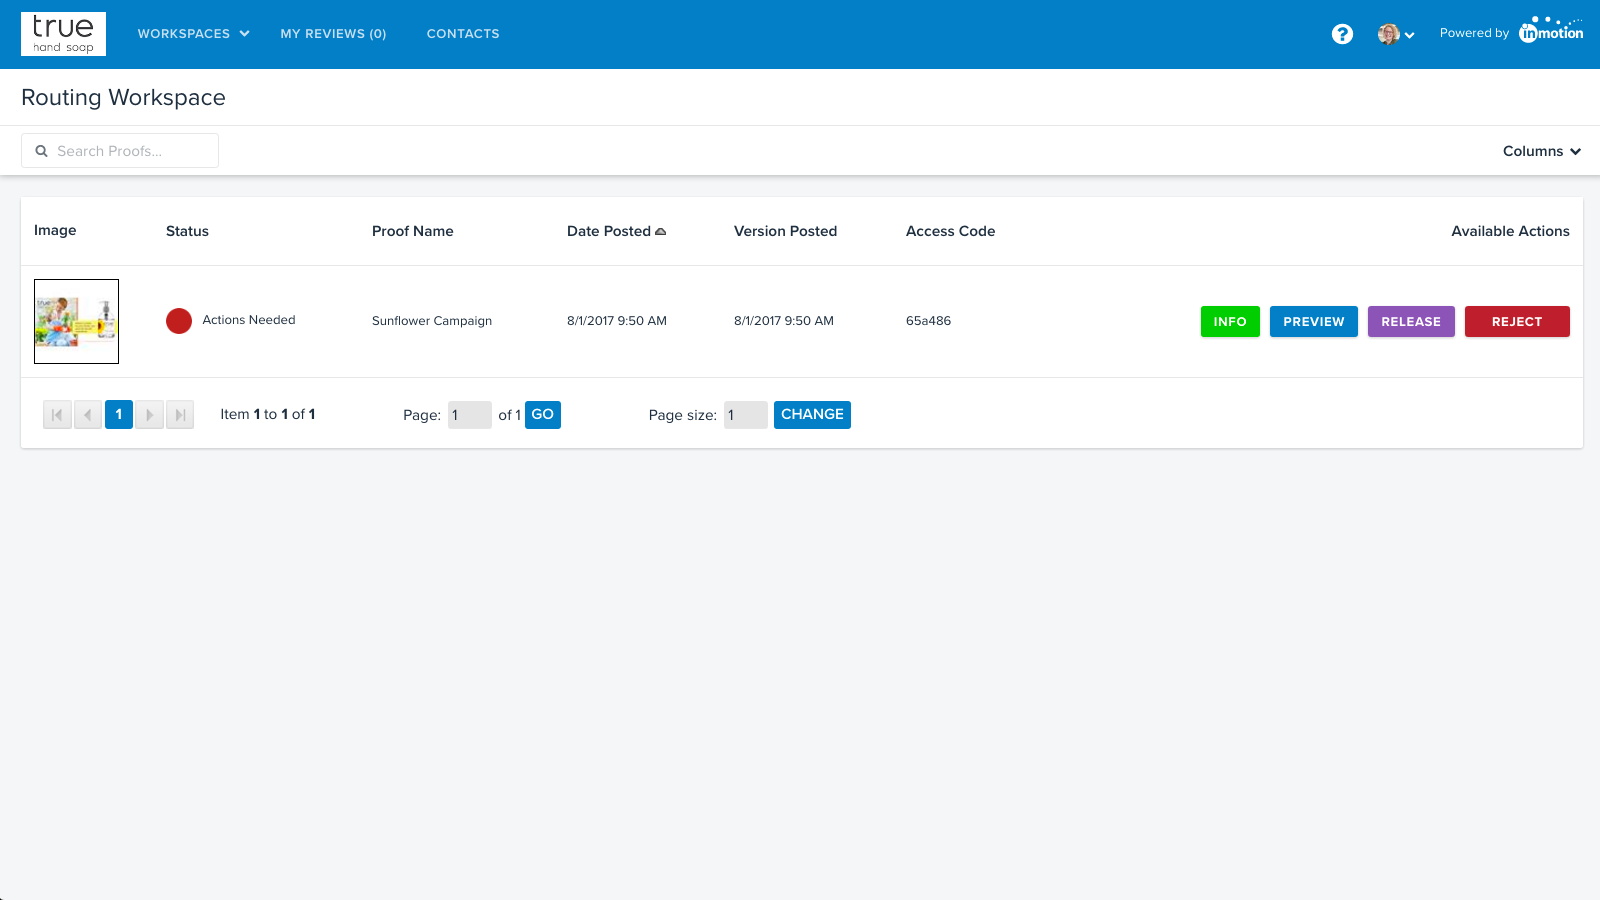
- The Routing Manager is notified by email that a new proof is waiting their action. Once they login to the Routing Workspace, they can Preview the content, Release the proof or Reject the proof back to the designer.
- If the Routing Manager chooses to Release the proof, they will be brought to the Select Reviewers page where they can select Contacts, Review Teams or Workflows for the pending reviewers list. There is also an option for Routing Managers to select 'Add me as last reviewer.' Once the reviewers are selected, click CONTINUE to proceed.

- Customize your Proof Release Options as necessary and click CONTINUE.
- Click FINALIZE to route the proof.


Additional Routing Manager Functionality
- Deadline Calendar - Routing Managers can view Proof Deadlines on a calendar view including Project Name and Status.
- Renotify - Once a proof has been released the Routing Manager can navigate to the Proof Info page to see who has completed their review. They can also renotify reviewers from this screen if they want to nudge someone who may not have yet reviewed the proof.
- Reject - A Routing Manager can also choose to reject a proof. This requires the Routing Manager to enter the review environment, submit feedback and provide a proof status.
- Create Review Teams and Workflows - Routing Managers can manage contacts and create their own Review Teams and/or Workflows for use in future proofs.