What are Contacts?
Contacts are typically clients or stakeholders in a project, that only require the ability to request work and/or review assets. Depending on their assigned permissions, they may require a unique login.
Contacts
Any person who requests and/or reviews content only.
Example: Client, Account Manager, Internal Stakeholder
Key Permissions of a Contact:
- Submit Requests using permissioned Job Launch forms
- Review and approve assets
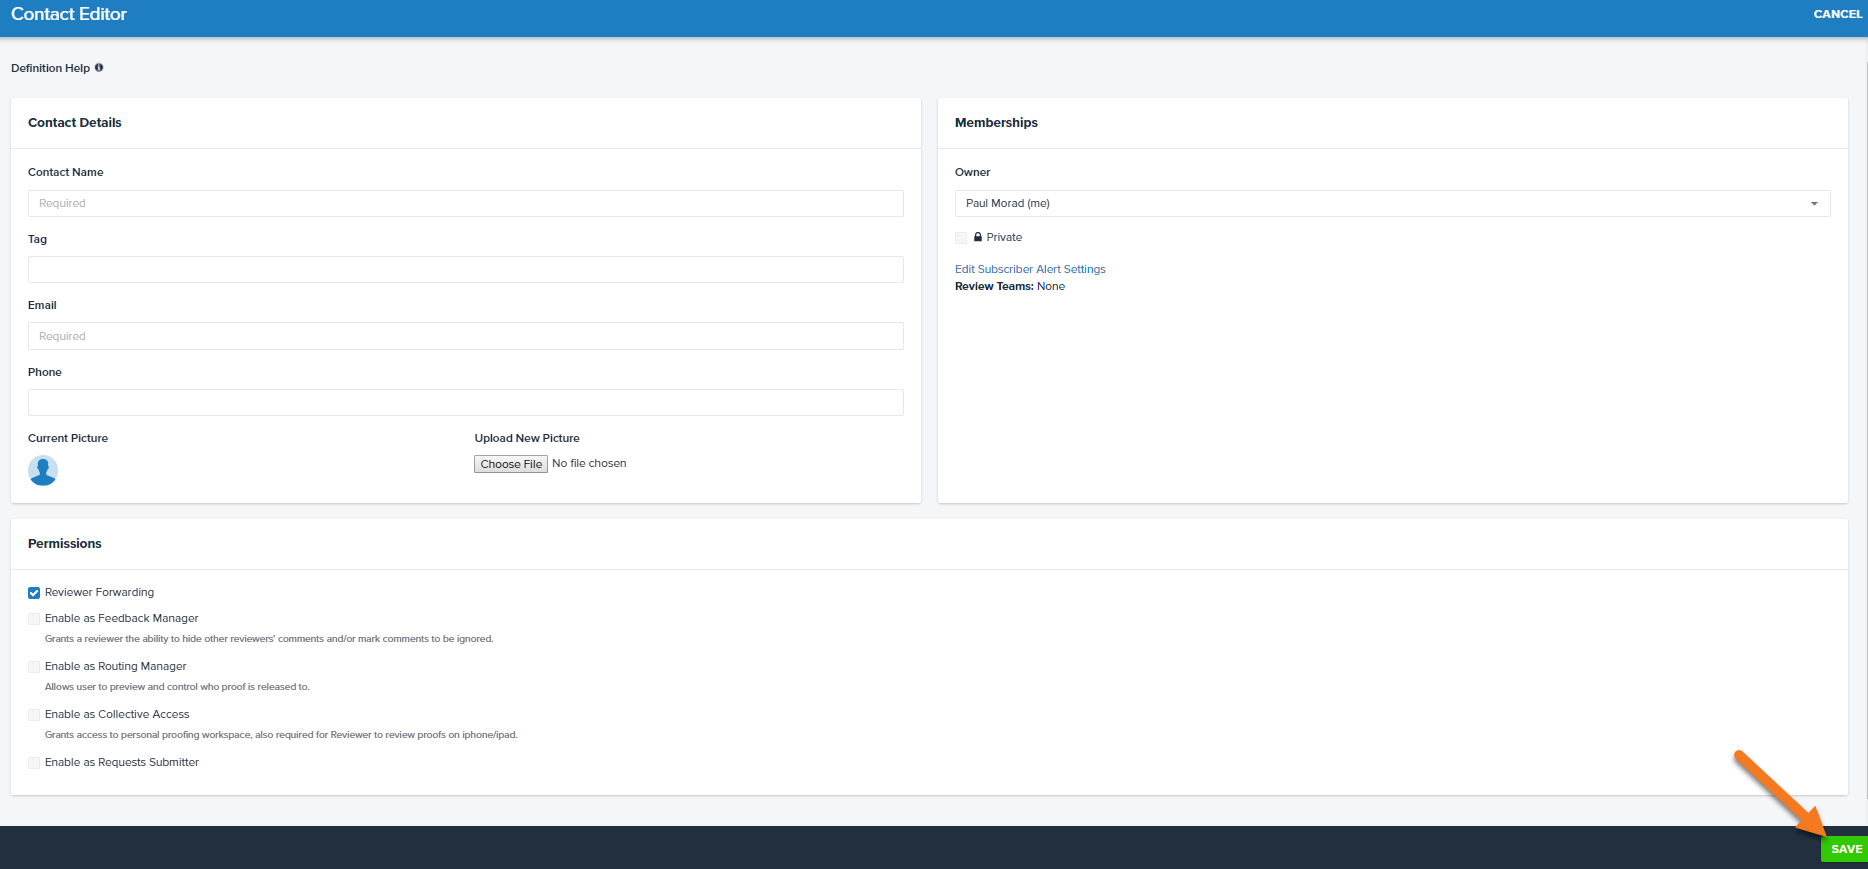
Adding Contacts
- Click on 'Contacts.'
- Click the 'Add Contact' button near the top left.
- Enter in the appropriate user details and assign permissions as applicable.
- Click 'Save' to create the contact.
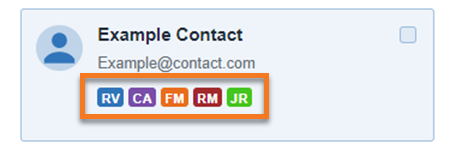
Contact Permission Levels
Unique permissions can be applied to each contact based on the actions they will need to perform. These permissions are denoted by unique symbols which can be found in various places throughout the application.
- Reviewer Forwarding
 - Allows the contact to give feedback and review proofs. This option is enabled by default on all contacts.
 - Feedback Manager
 - Gives the ability to hide or disregard other reviewers' comments and/or mark comments to be ignored. Contacts with this permission can also mark comments as ‘To-Do’ or ‘Important.’
 - Routing Manager
 - Used in rare and unique cases, this feature grants the user access to a dedicated workspace to manage proofs released to them. Routing managers control the release of content first by previewing the proof, then choosing to release it to reviewers or reject it back to the proof uploader with their own markups and comments. From this workspace, routing managers can also manage applicable contacts. This permission requires a unique login.
 - Collective Access
 - Provides the contact with login credentials and access to the 'My Reviews' page, containing their past and pending reviews.
 - Job Launch Submitter
 - Allows the contact to submit requests utilizing the job launch forms assigned to them. This requires a unique login. Contacts with this permission may still need to be assigned to a Job Launch Form.
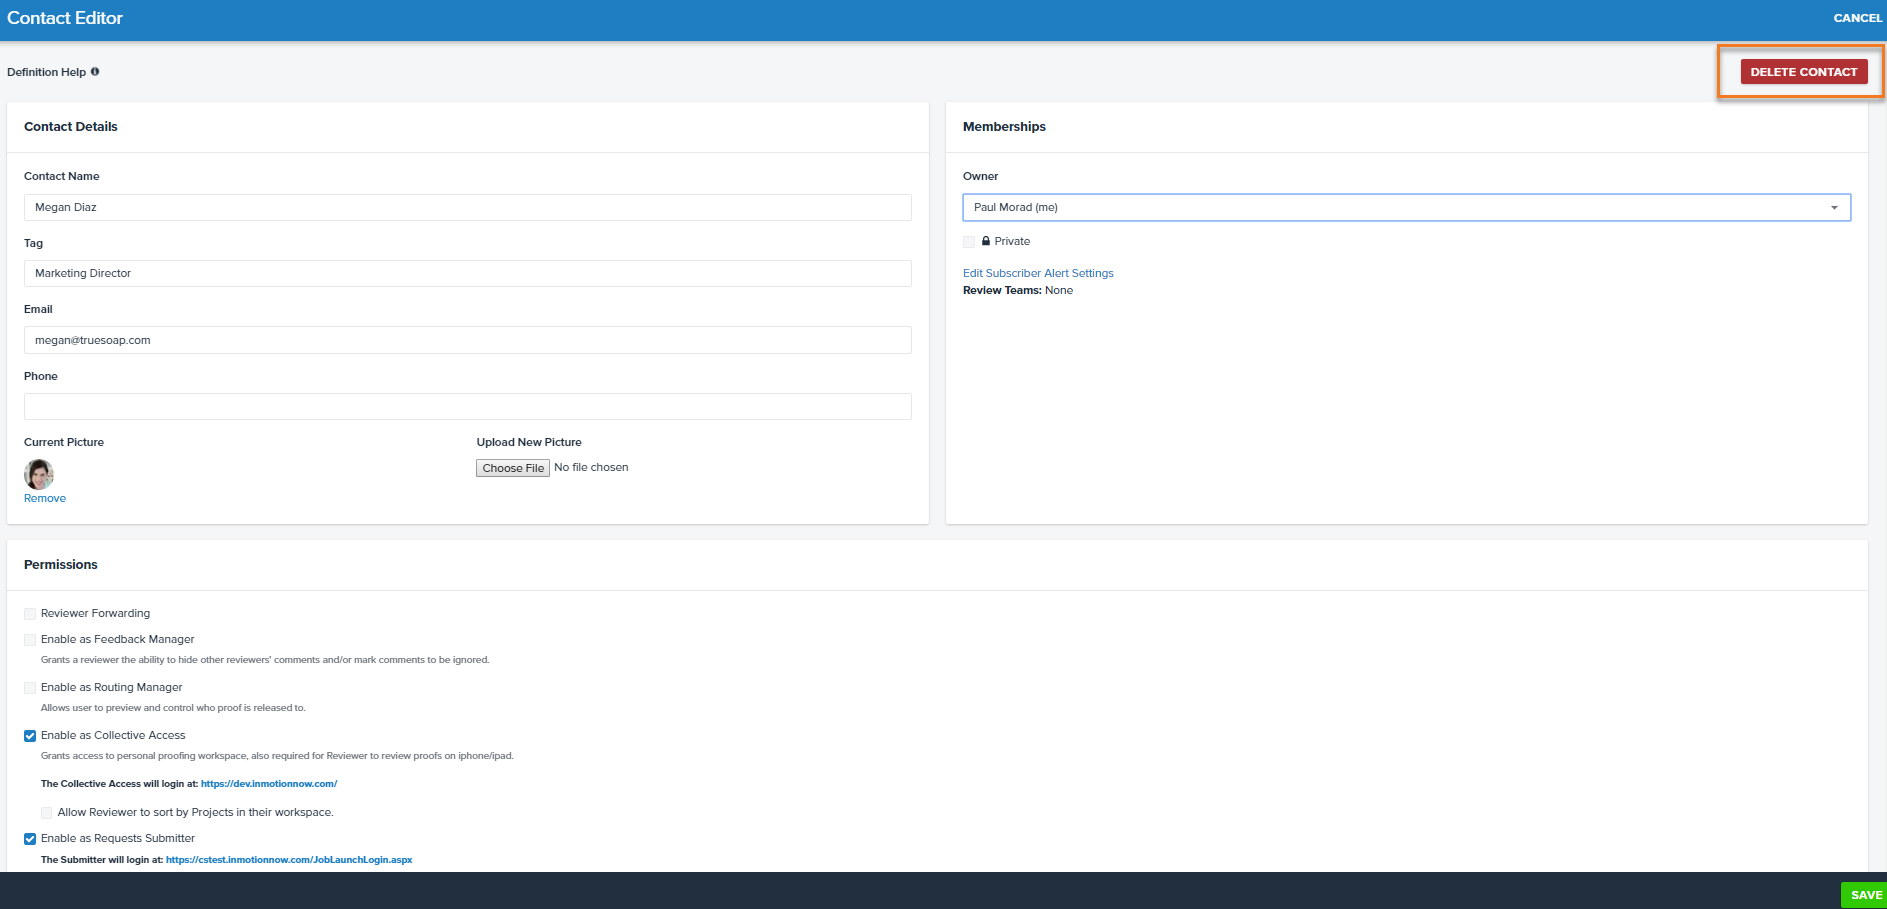
Editing and Deleting Contacts
- Click on the 'Contacts' tab.
- Click on the contact you wish to Edit or Delete.
- If editing, make any necessary changes and select 'Save.'
- To delete, click 'Delete Contact' in the top right corner.