Conversations
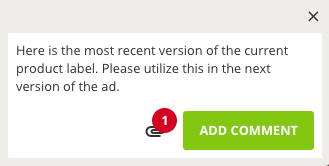
The collaboration panel organizes all reviewer comments. Add general comments by clicking on the green comment icon at the bottom right of the collaboration panel.
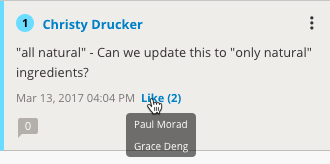
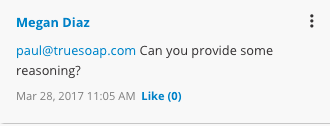
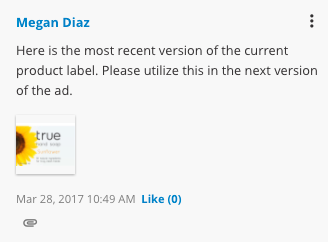
You are able to like and reply to other reviewers’ comments. Hover over the word 'Like' or 'Unlike' to see who has liked that comment.
Reply to another reviewer’s comment by clicking on that comment in the collaboration panel, adding your reply, and clicking to save. The reviewer who authored the comment will receive an email notification and an in-app notification for the newly added reply. After adding a reply, click 'Back to All Conversations' at the top of the collaboration panel. Comments and replies are grouped together in a conversation thread.

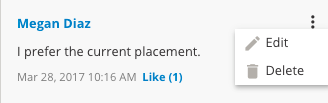
Open the comment option menu by clicking on the three dots in the upper right hand corner of the comment. From here you can edit and delete your comments.
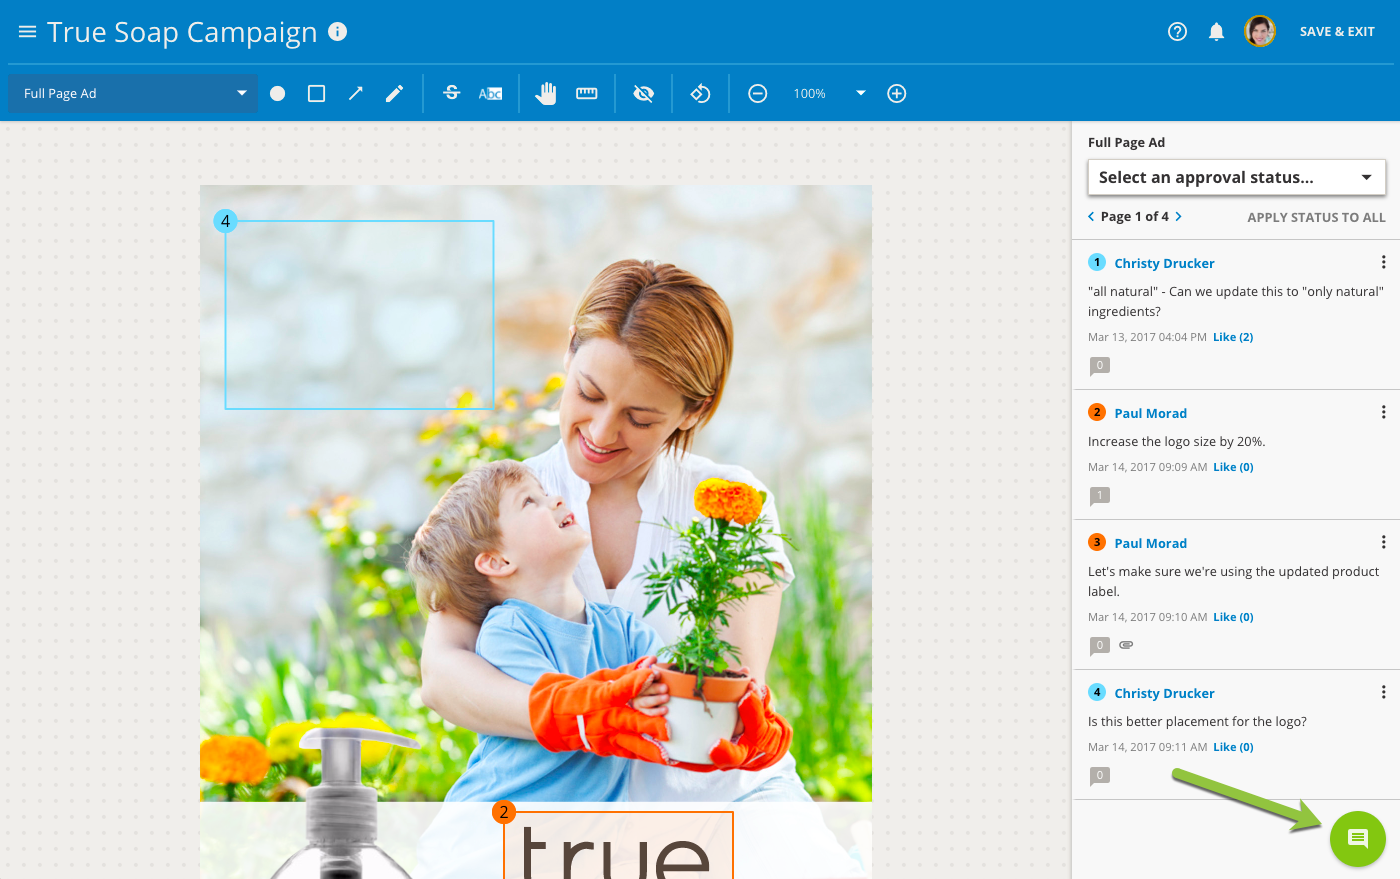
While reviewing an annotated asset, clicking on the number next to a markup will highlight that markup on the review canvas and display the associated comment thread in the collaboration panel. Conversely, clicking on a comment thread will highlight the associated markup on the review canvas.

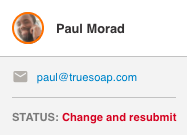
You are also able to view the contact card for anyone who has already commented on an asset by clicking on their name in the conversation panel. This will show their photo, email address and the approval status they assigned to the asset, if available. Clicking on their email address opens a new email in your default email client.
@Mentioning
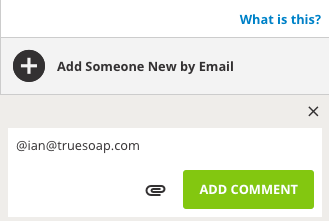
If 'Allow Forwarding' is enabled by the proof uploader, you are able to draw another reviewer’s attention to a particular comment by using @mentioning. When adding a comment, type the @ symbol and a list of invited reviewers for that proof will populate.

Simply click on the reviewer’s name to mention him or her in your comment. If the user you @mention has not yet submitted an approval status, they will then be required to do so. If they have already submitted an approval status, they will need to resubmit their status.
You can also use this feature to invite new reviewers to the proof by entering an email address after the @ symbol. These reviewers will receive an email requiring them to review the proof and submit an approval status. The user will also receive an in-app notification. The proof owner will receive an email notification each time a new user is invited to review the proof.
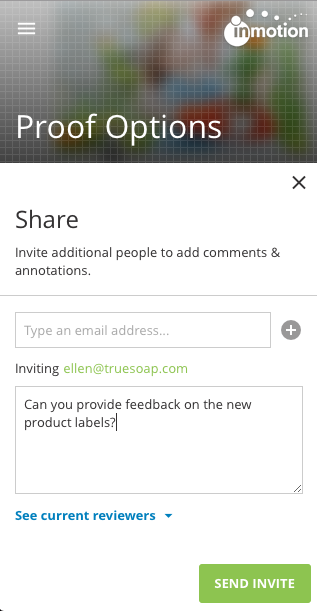
Sharing the Proof
You can also utilize the Proof Options menu to share the proof, if 'Allow Forwarding' is enabled by the proof uploader. This option allows you to invite additional reviewers to the proof and the option to include an custom message in the email invitation.
@Mentioning and Sharing a proof requires the new user mentioned to submit an approval status, which may delay the progression of the review. If the proof workflow is sequential, the @mentioned user will be added to the end of the workflow and will not receive an email notification or have access to the proof until it is their turn in the review. If the proof workflow is tiered, the @mentioned user will be invited at the end of the current tier.
Attaching Files
Reference files or other documents related to a comment or reply are attached by clicking the paperclip icon in the comment box, browsing for the file on your computer, and clicking .
Attachments must be associated to a comment to provide context for other reviewers as well as the uploader. The size limitation for adding attachments is 500 MB.
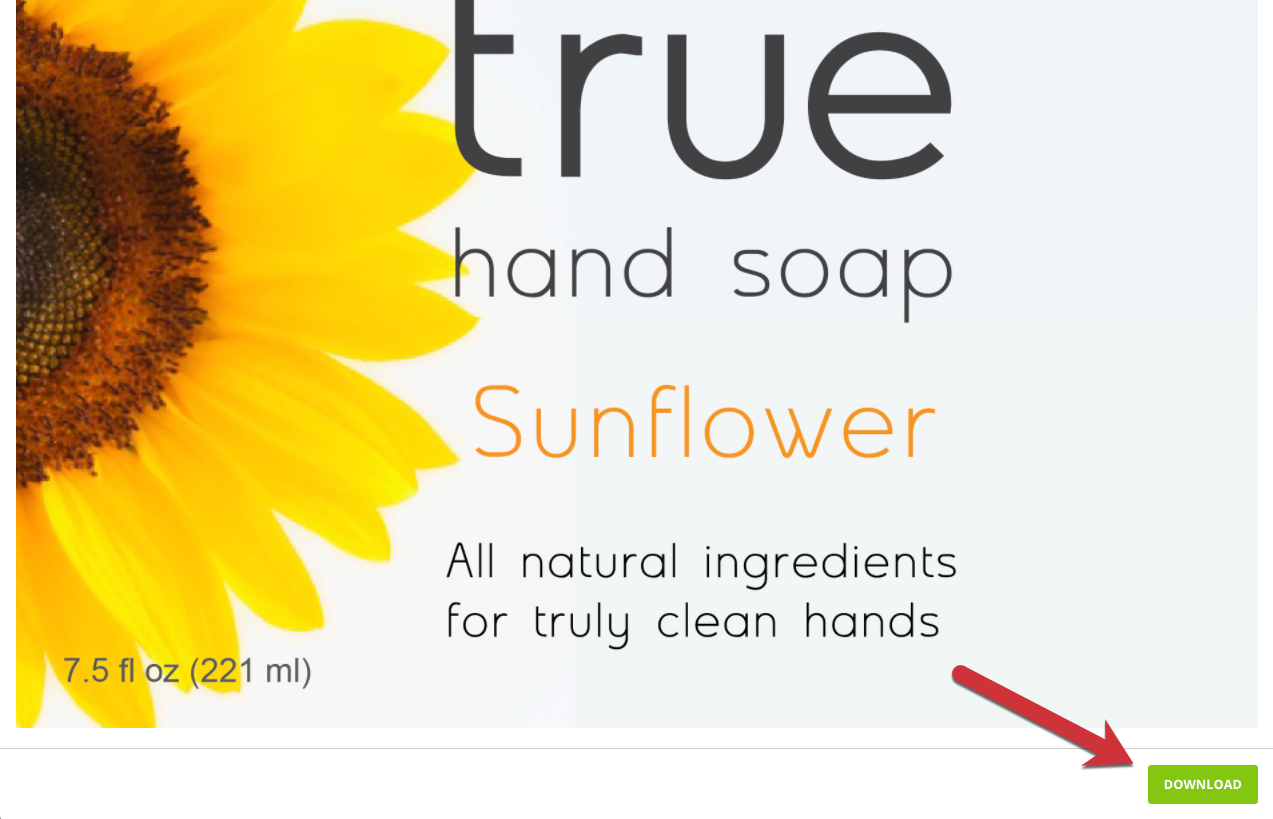
After saving your comment, the file will be available for download by other reviewers.
To access an attachment uploaded by a previous user, click on the comment containing the attachment, and then click on the attachment thumbnail. This opens a preview. Click the download button on the bottom right of the preview to download the attachment.
Notifications
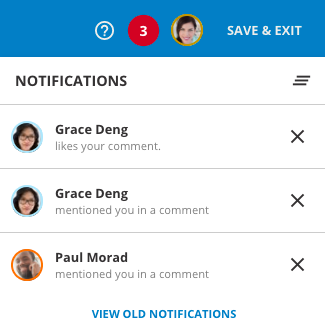
Users will receive in-app notifications and email notifications if another user replies to their comment or adds an @mention to them in any comment. You can view your notifications by clicking on the bell icon in the top right of review environment. 
If you have unread notifications, this icon will show as a red circle containing the corresponding number of notifications. When viewing your notifications, you will only see the notifications pertaining to the proof currently being viewed. Select the notification to be brought to the conversation that triggered the notification.
Annotation Options
Your annotation color is randomly chosen when you enter the review environment. You can change the color of your annotations by clicking on your profile icon at the top right corner of the blue header bar. Select a color from the palette options that will be clearly visible when adding mark ups to the proof.
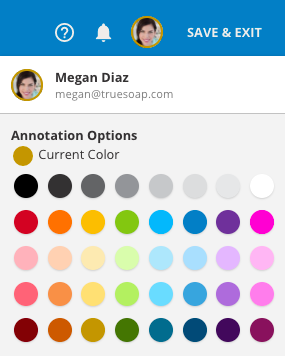
The system will allow you to select the same annotation color as another reviewer. However, we recommend choosing a different color than other reviewers so that your team collaboration will be more effective and easier for the content producer to discern.
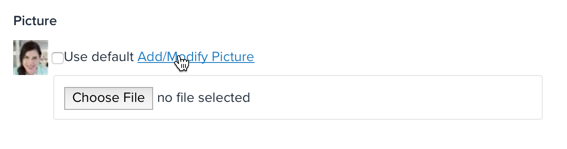
If you have not uploaded a profile picture, your profile icon will display a default image that matches your annotation color. With staff level access to inMotion, you can upload a custom profile picture by navigating to the Contacts Tab, selecting your contact card, and uploading a picture in the Contact Details section of the Edit Contact page. If you do not have access to this part of the application, contact your administrator for assistance.